A fast and efficient method of drying prints was developed at Crown Point Press in the early 1970s, and is still in use here now. The Crown Point dryer uses corrugated cardboard stacked alternately with dense smooth cardboard (Upson Board) that can be interleaved with damp prints. The whole stack is then put under pressure and hot air is forced through the corrugations to dry the prints.
Building a Dryer
• Construct or buy two sturdy low tables, at least the size of the prints you will be drying. One table stores the dryer. When it is loaded or unloaded the cardboard sheets are restacked on the other table.
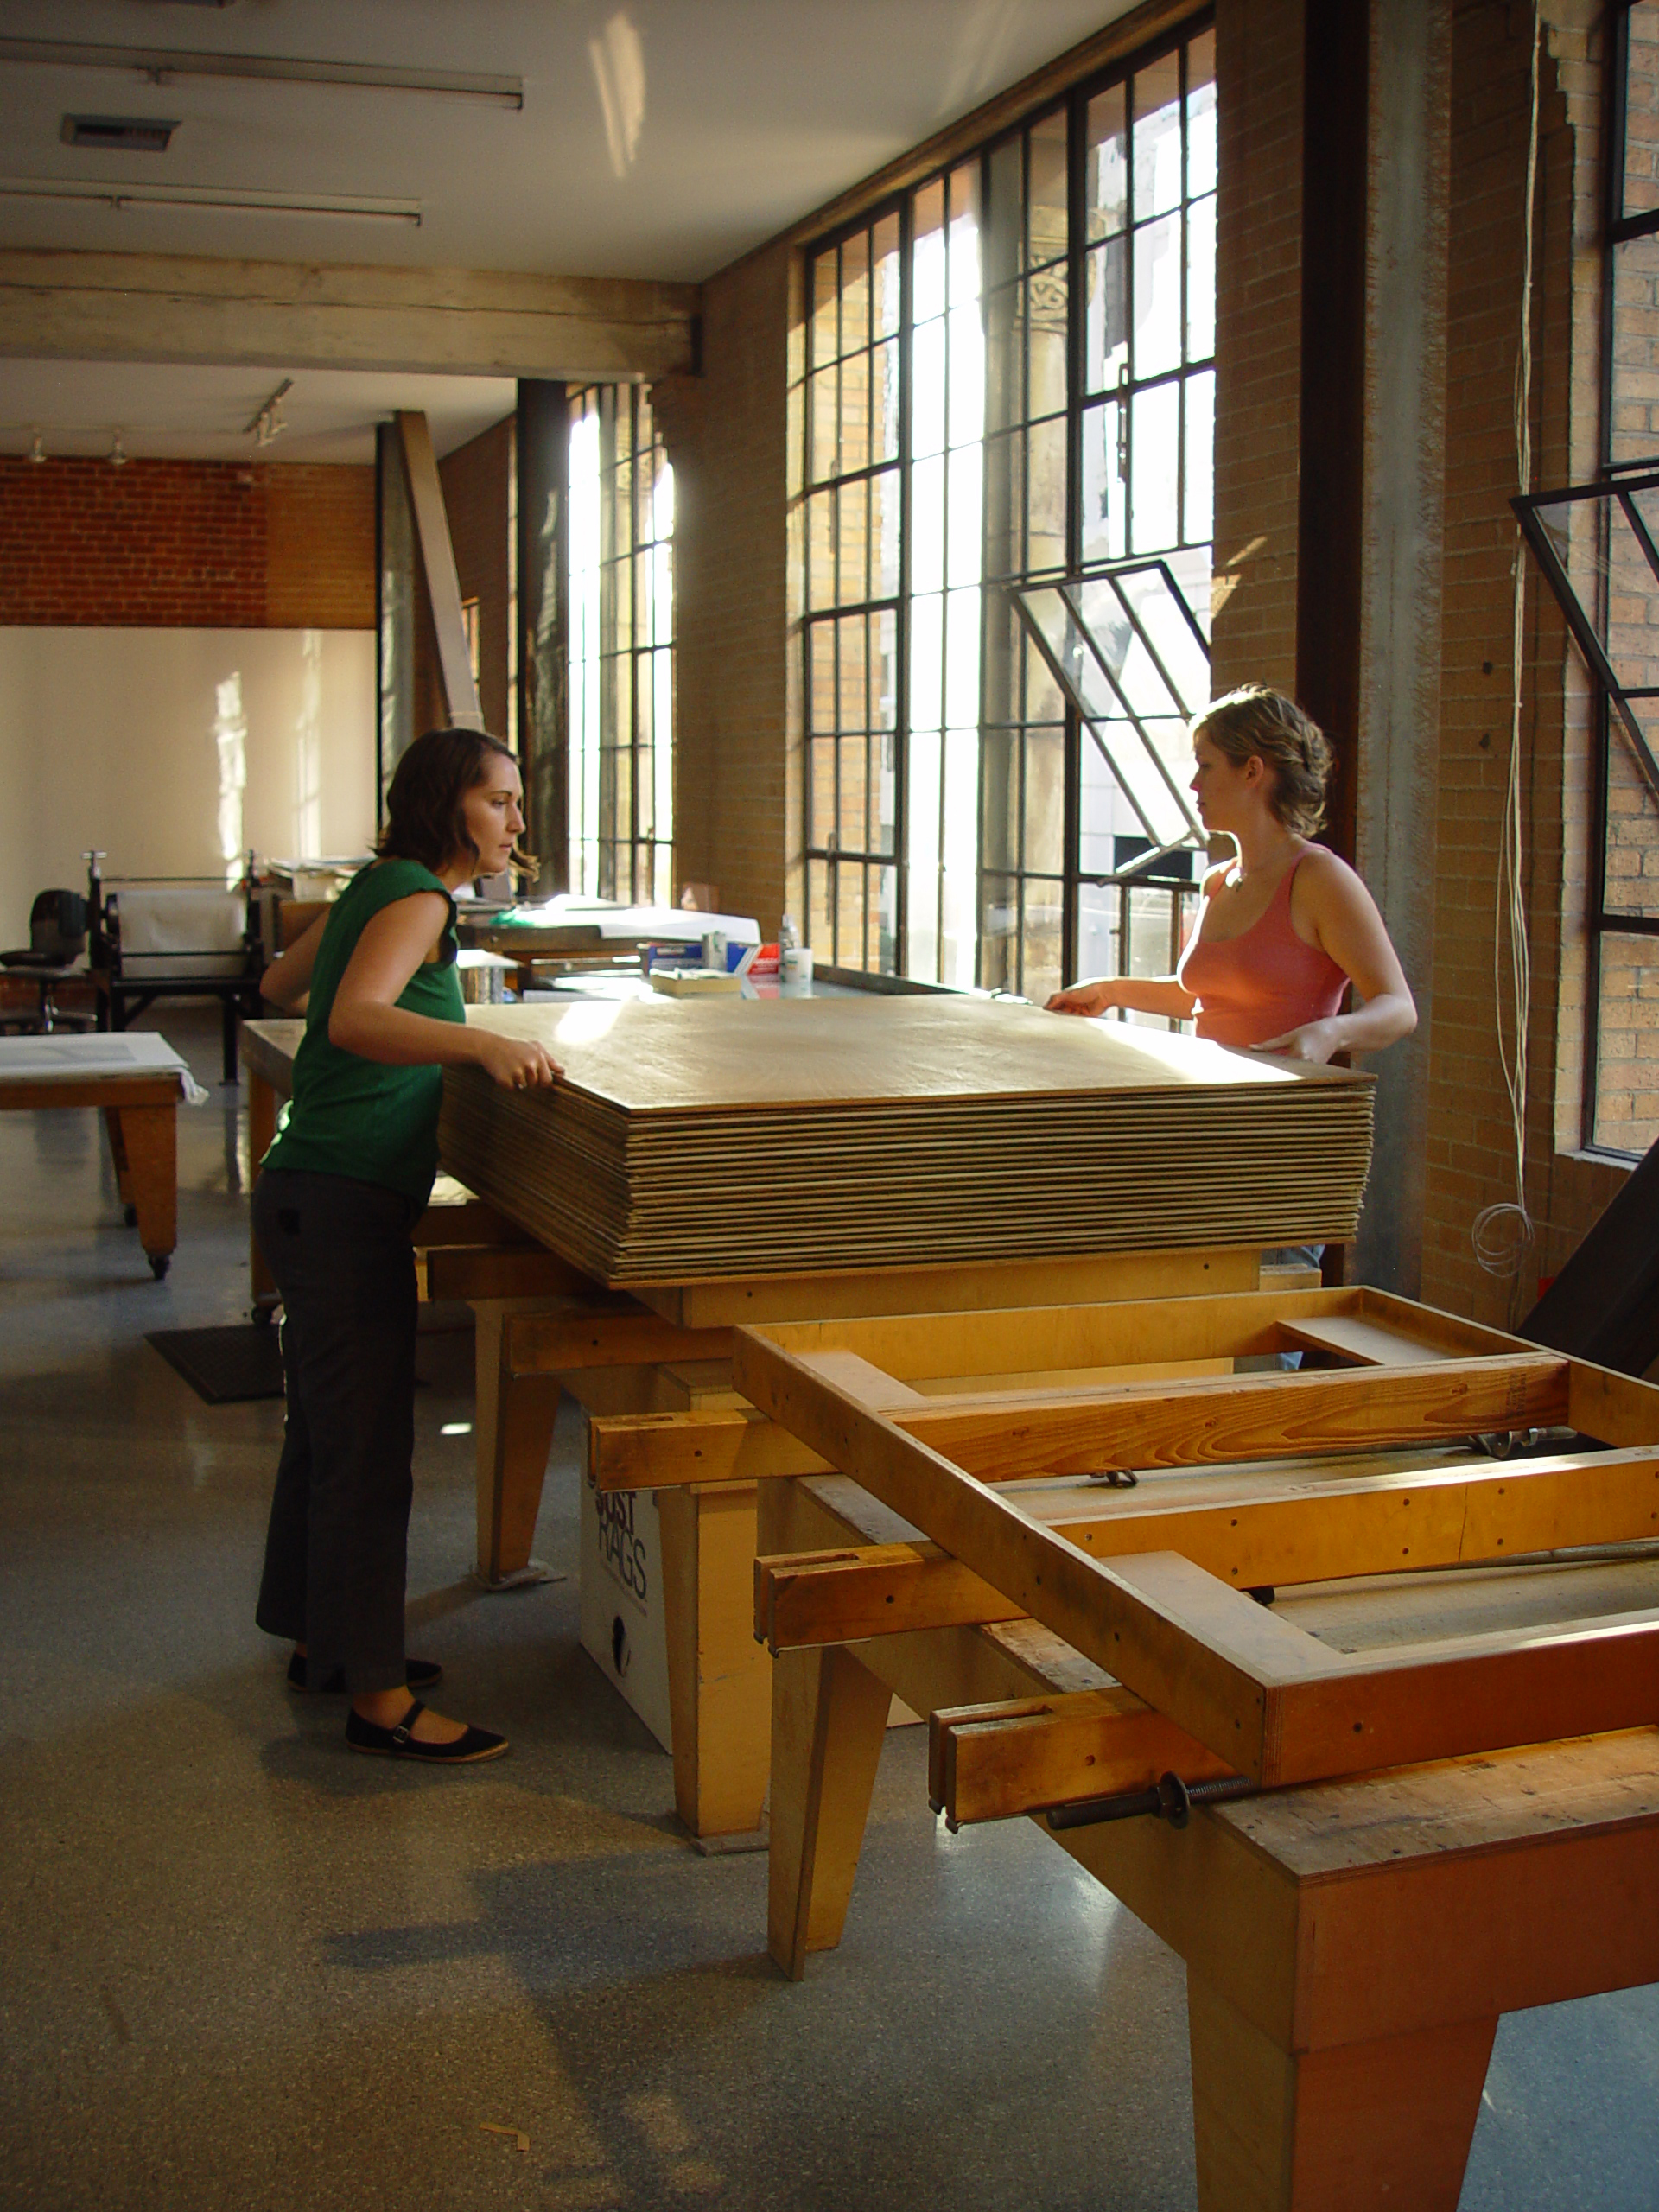
• Obtain sheets of heavy double-walled corrugated cardboard, corrugations running the length rather than the width of the stock. Cut them to the size of your tables.
• At a lumber yard, purchase sheets of commercial soundproofing material called Upson Board, a dense cardboard used as a barrier in walls. It has a pebbled side and a smooth, or face, side. Cut (or order precut) these sheets to the size of your tables. Place two sheets of Upson Board, face to face, between each corrugated cardboard sheet.
If your work is small, you can use matboard or other dense cardboard that is one-eighth inch or more thick instead of Upson Board. It must be thick enough to resist taking the imprint of the corrugations.
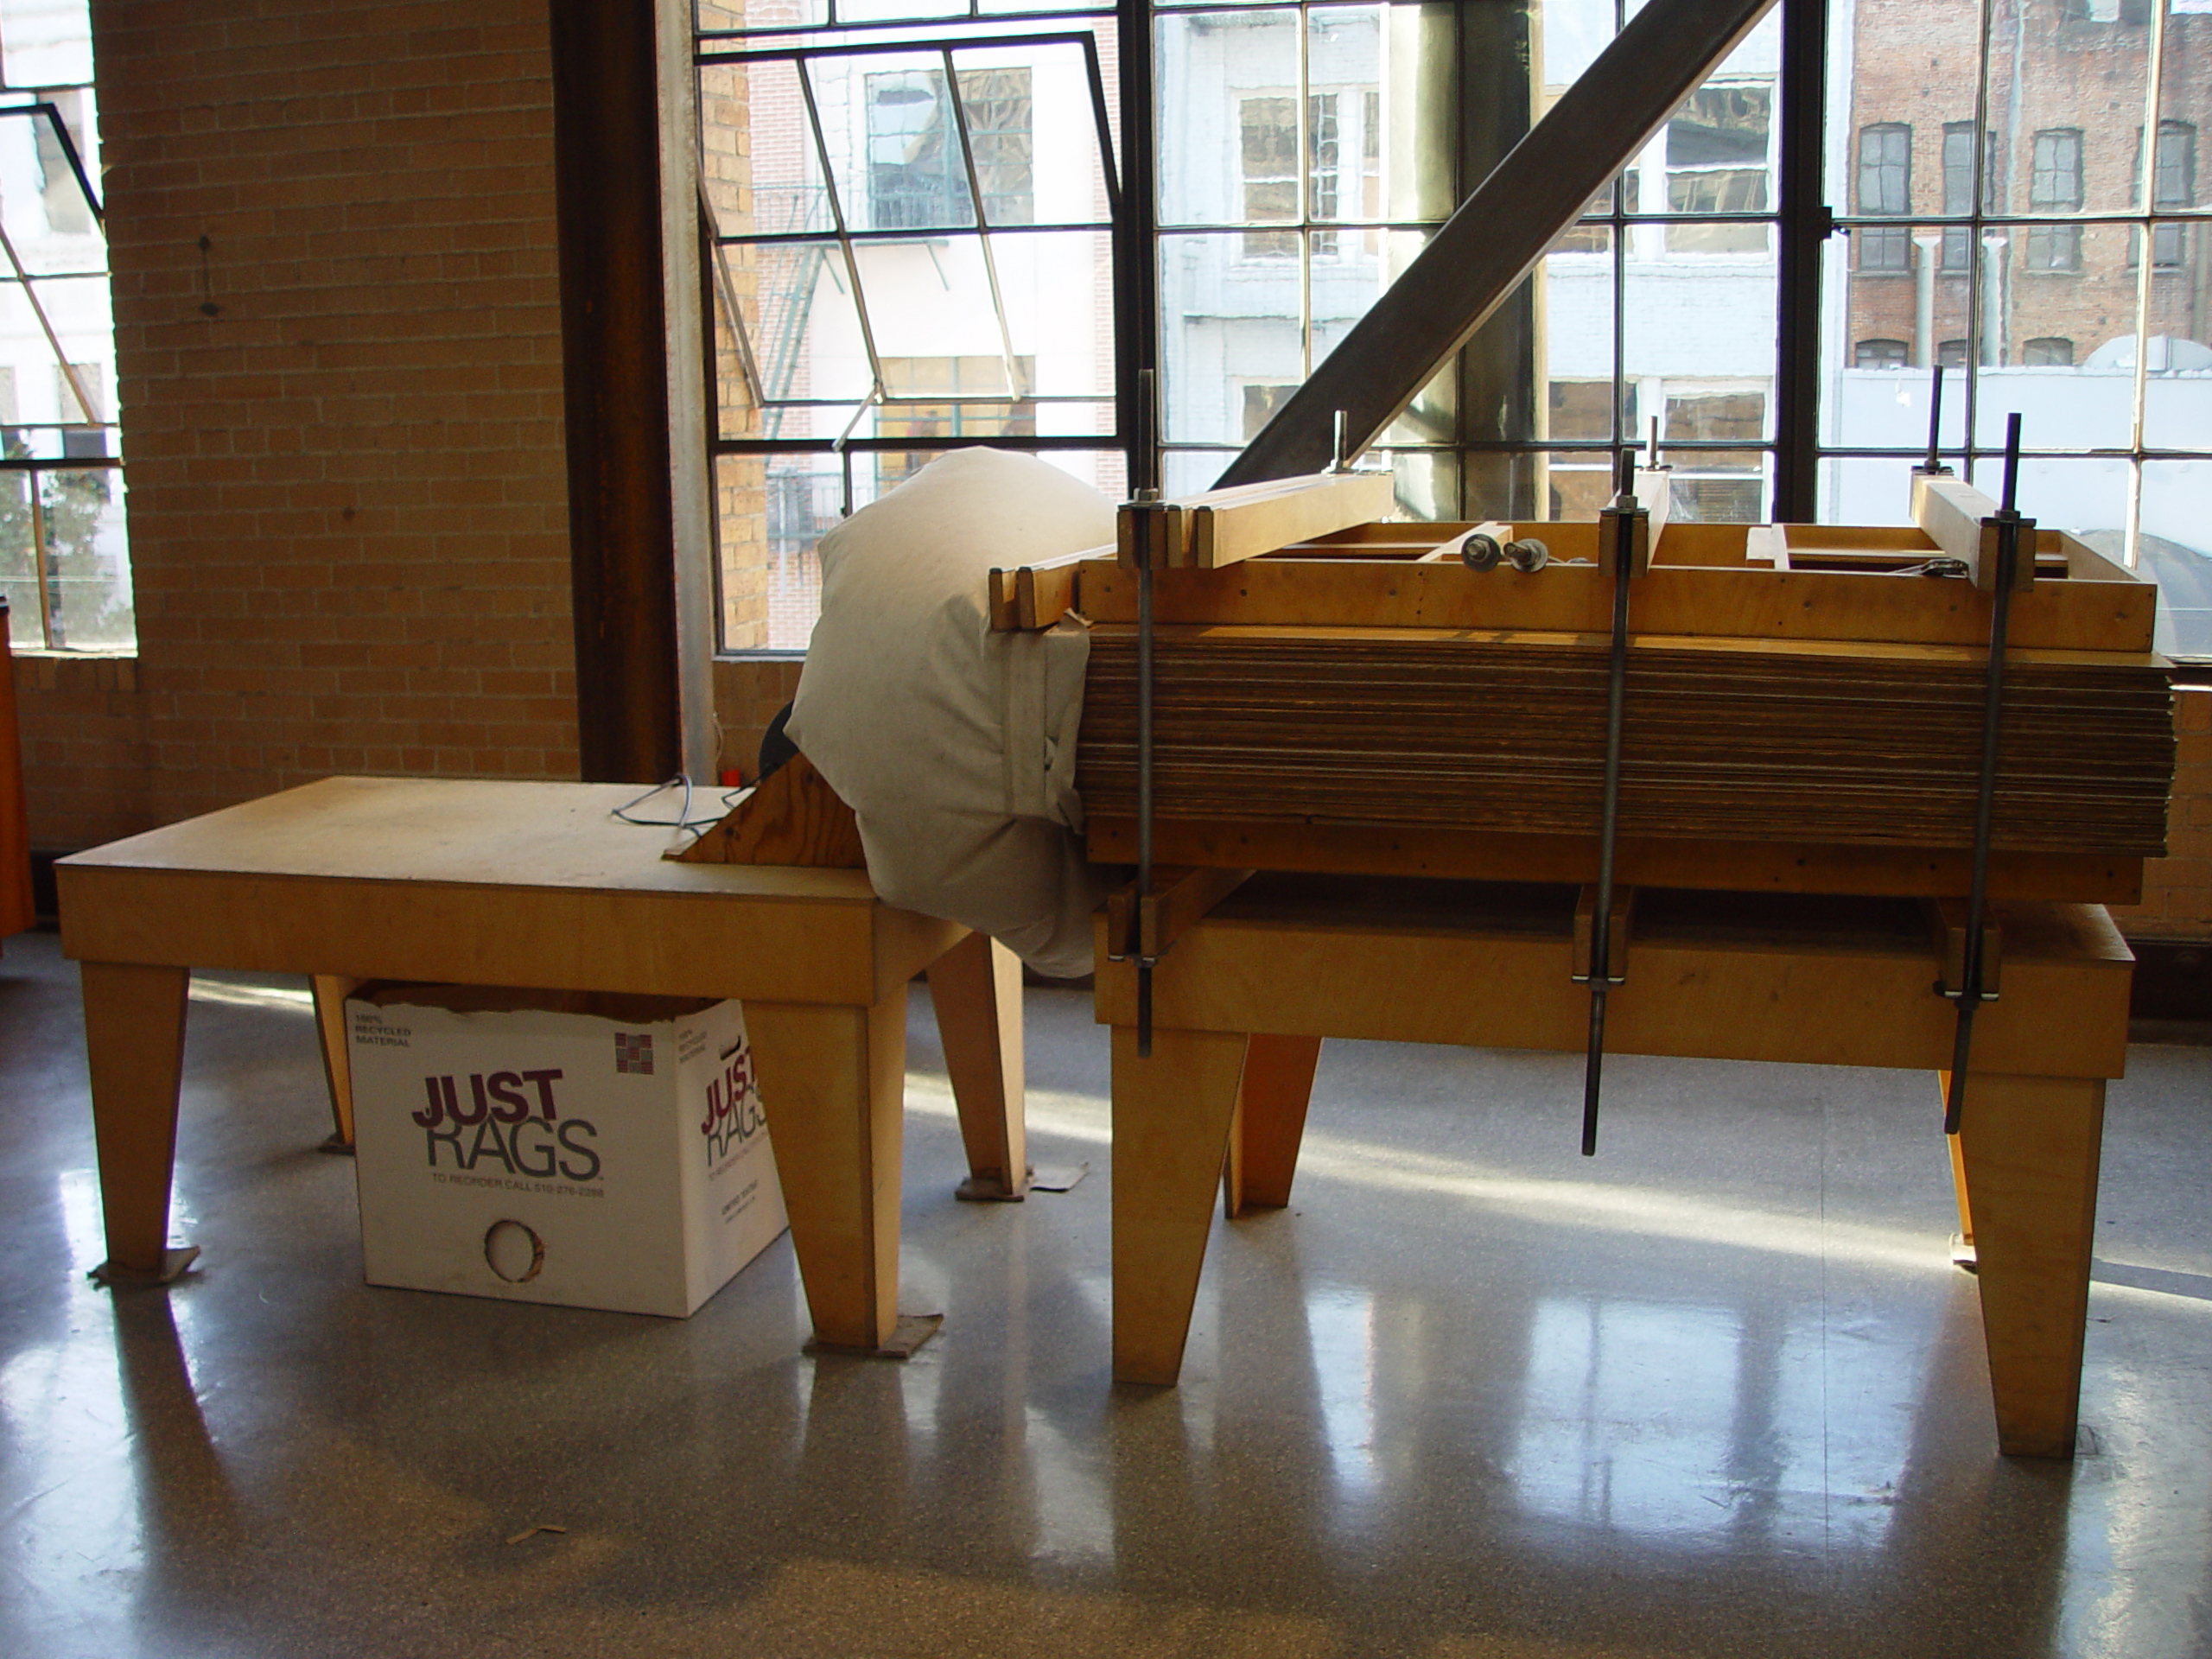
• Obtain two pieces of three-quarter inch plywood the size of your tables. Place them at the bottom and on the top of the cardboard stack.
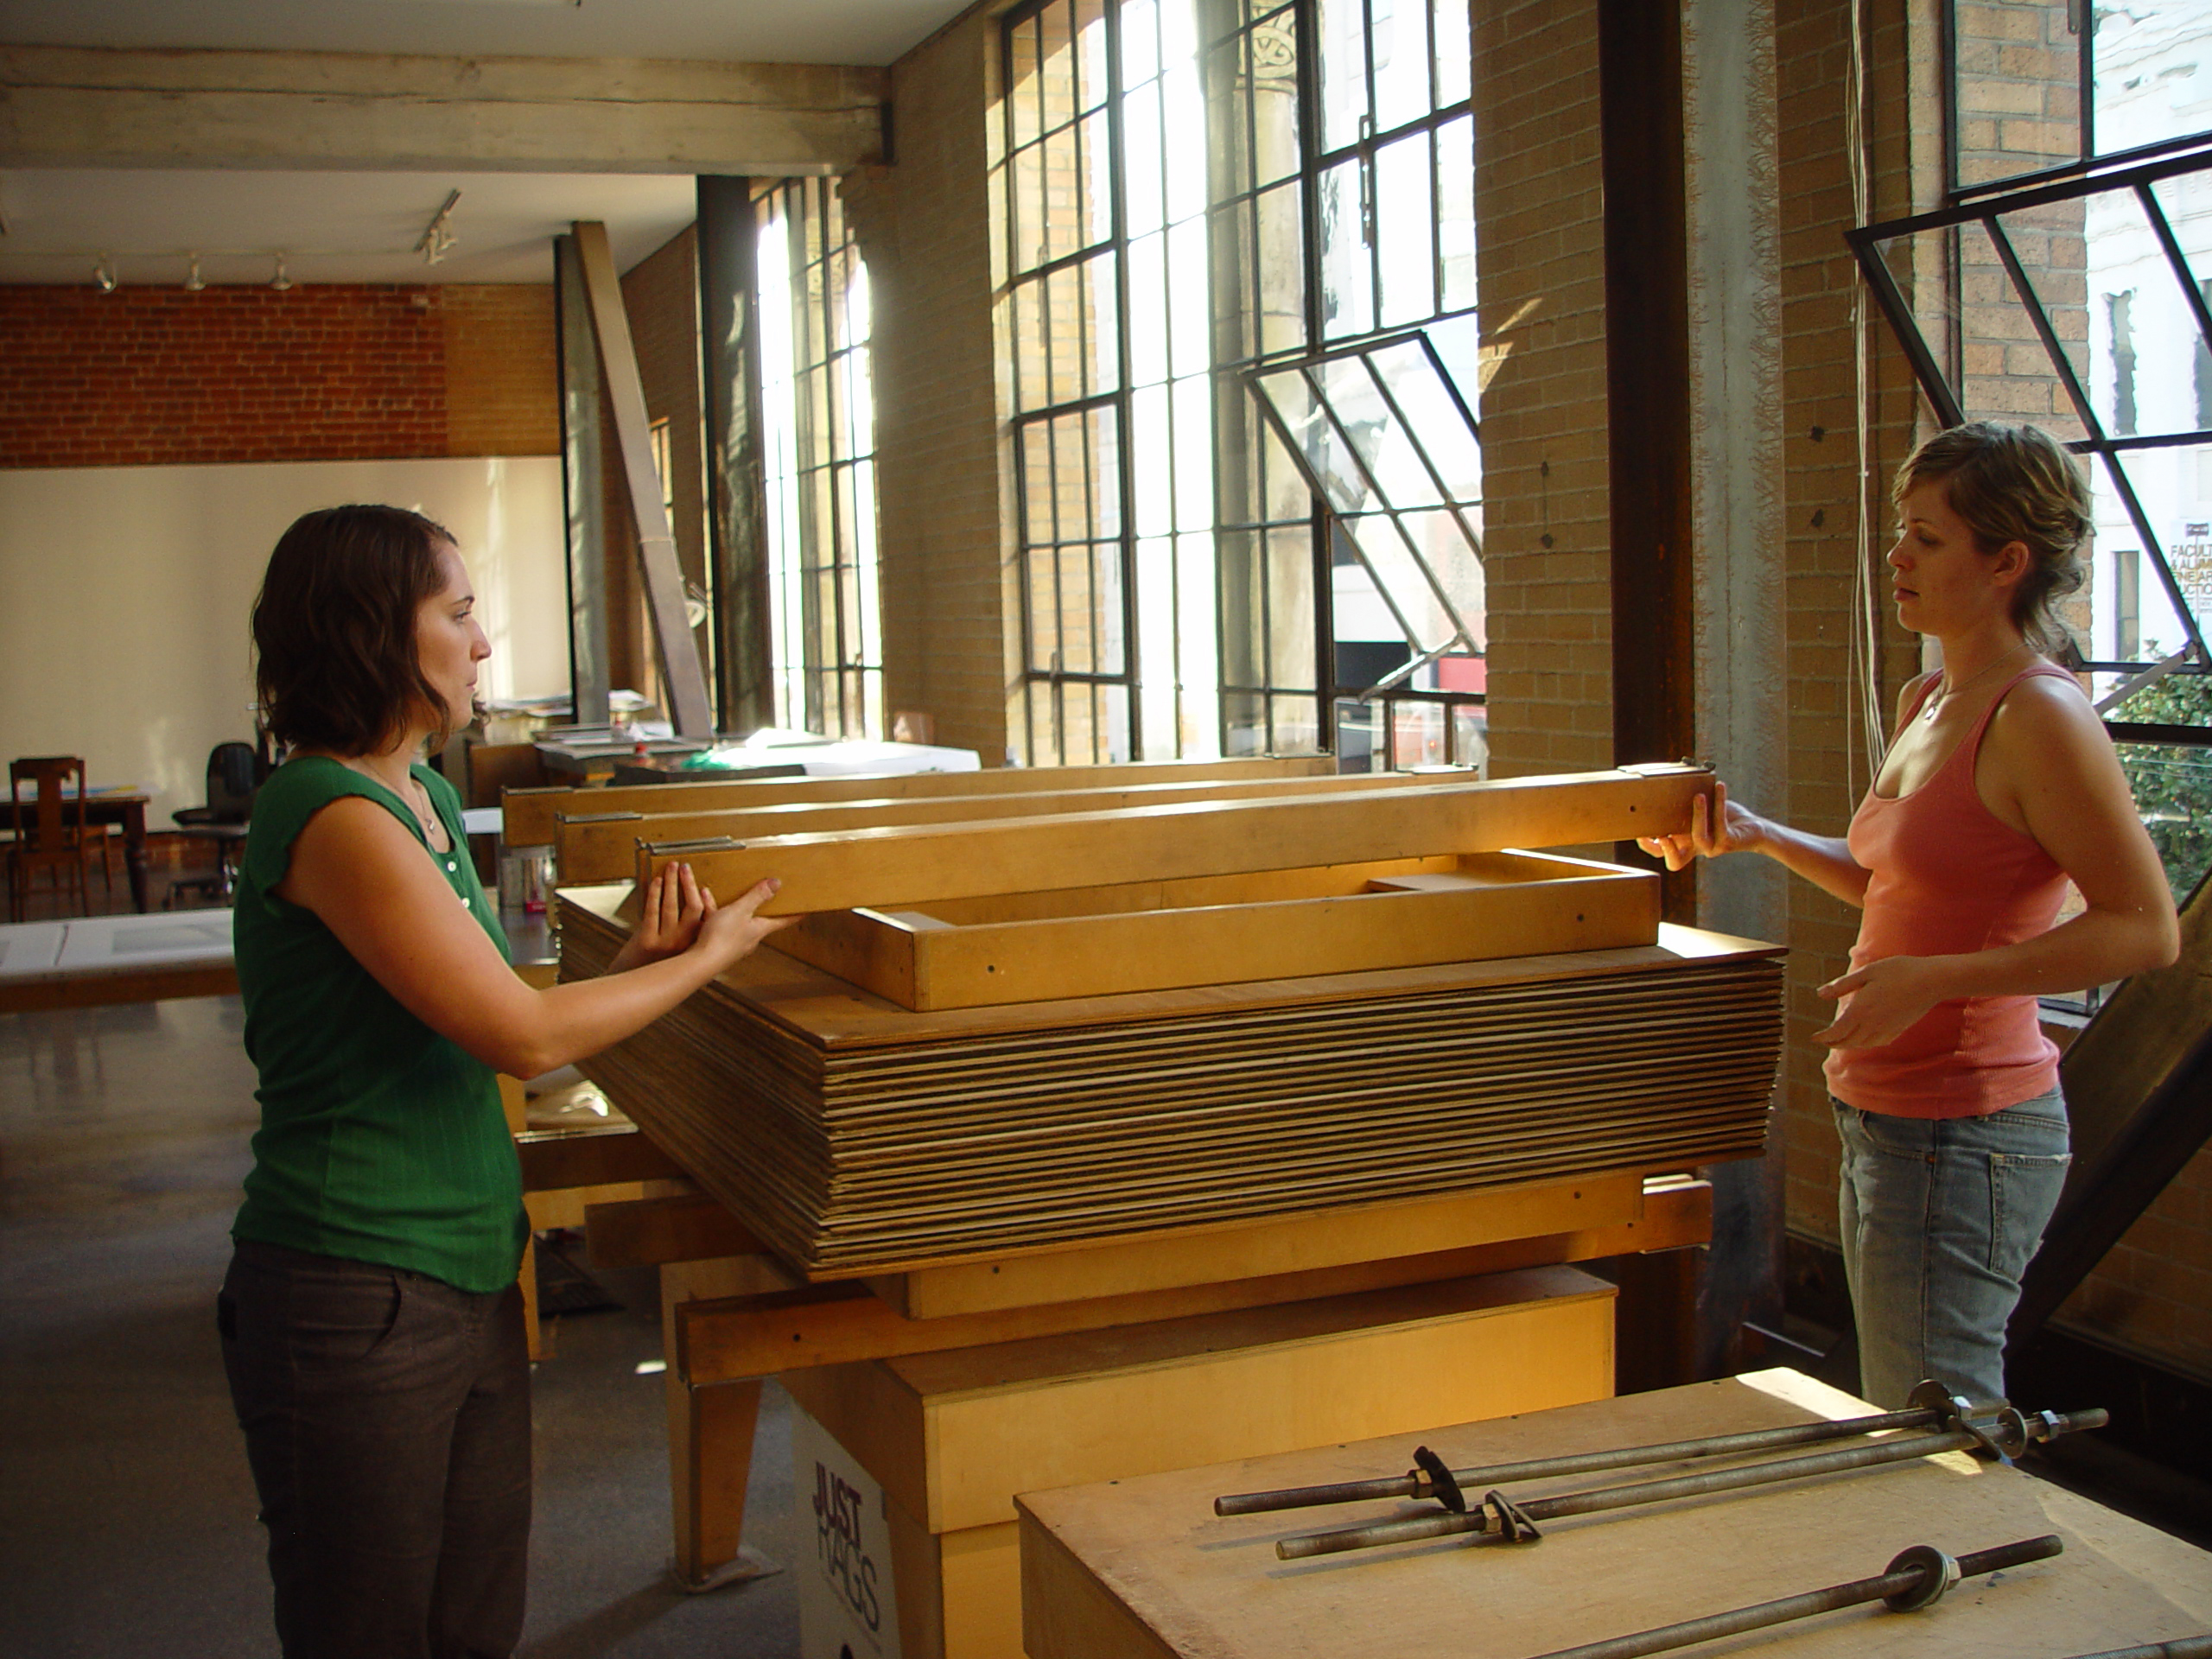
• Build two rigid frames the size of your tables. The frames go under and over the dryer stack to equalize the pressure you apply on the stack and keep the plywood from warping.
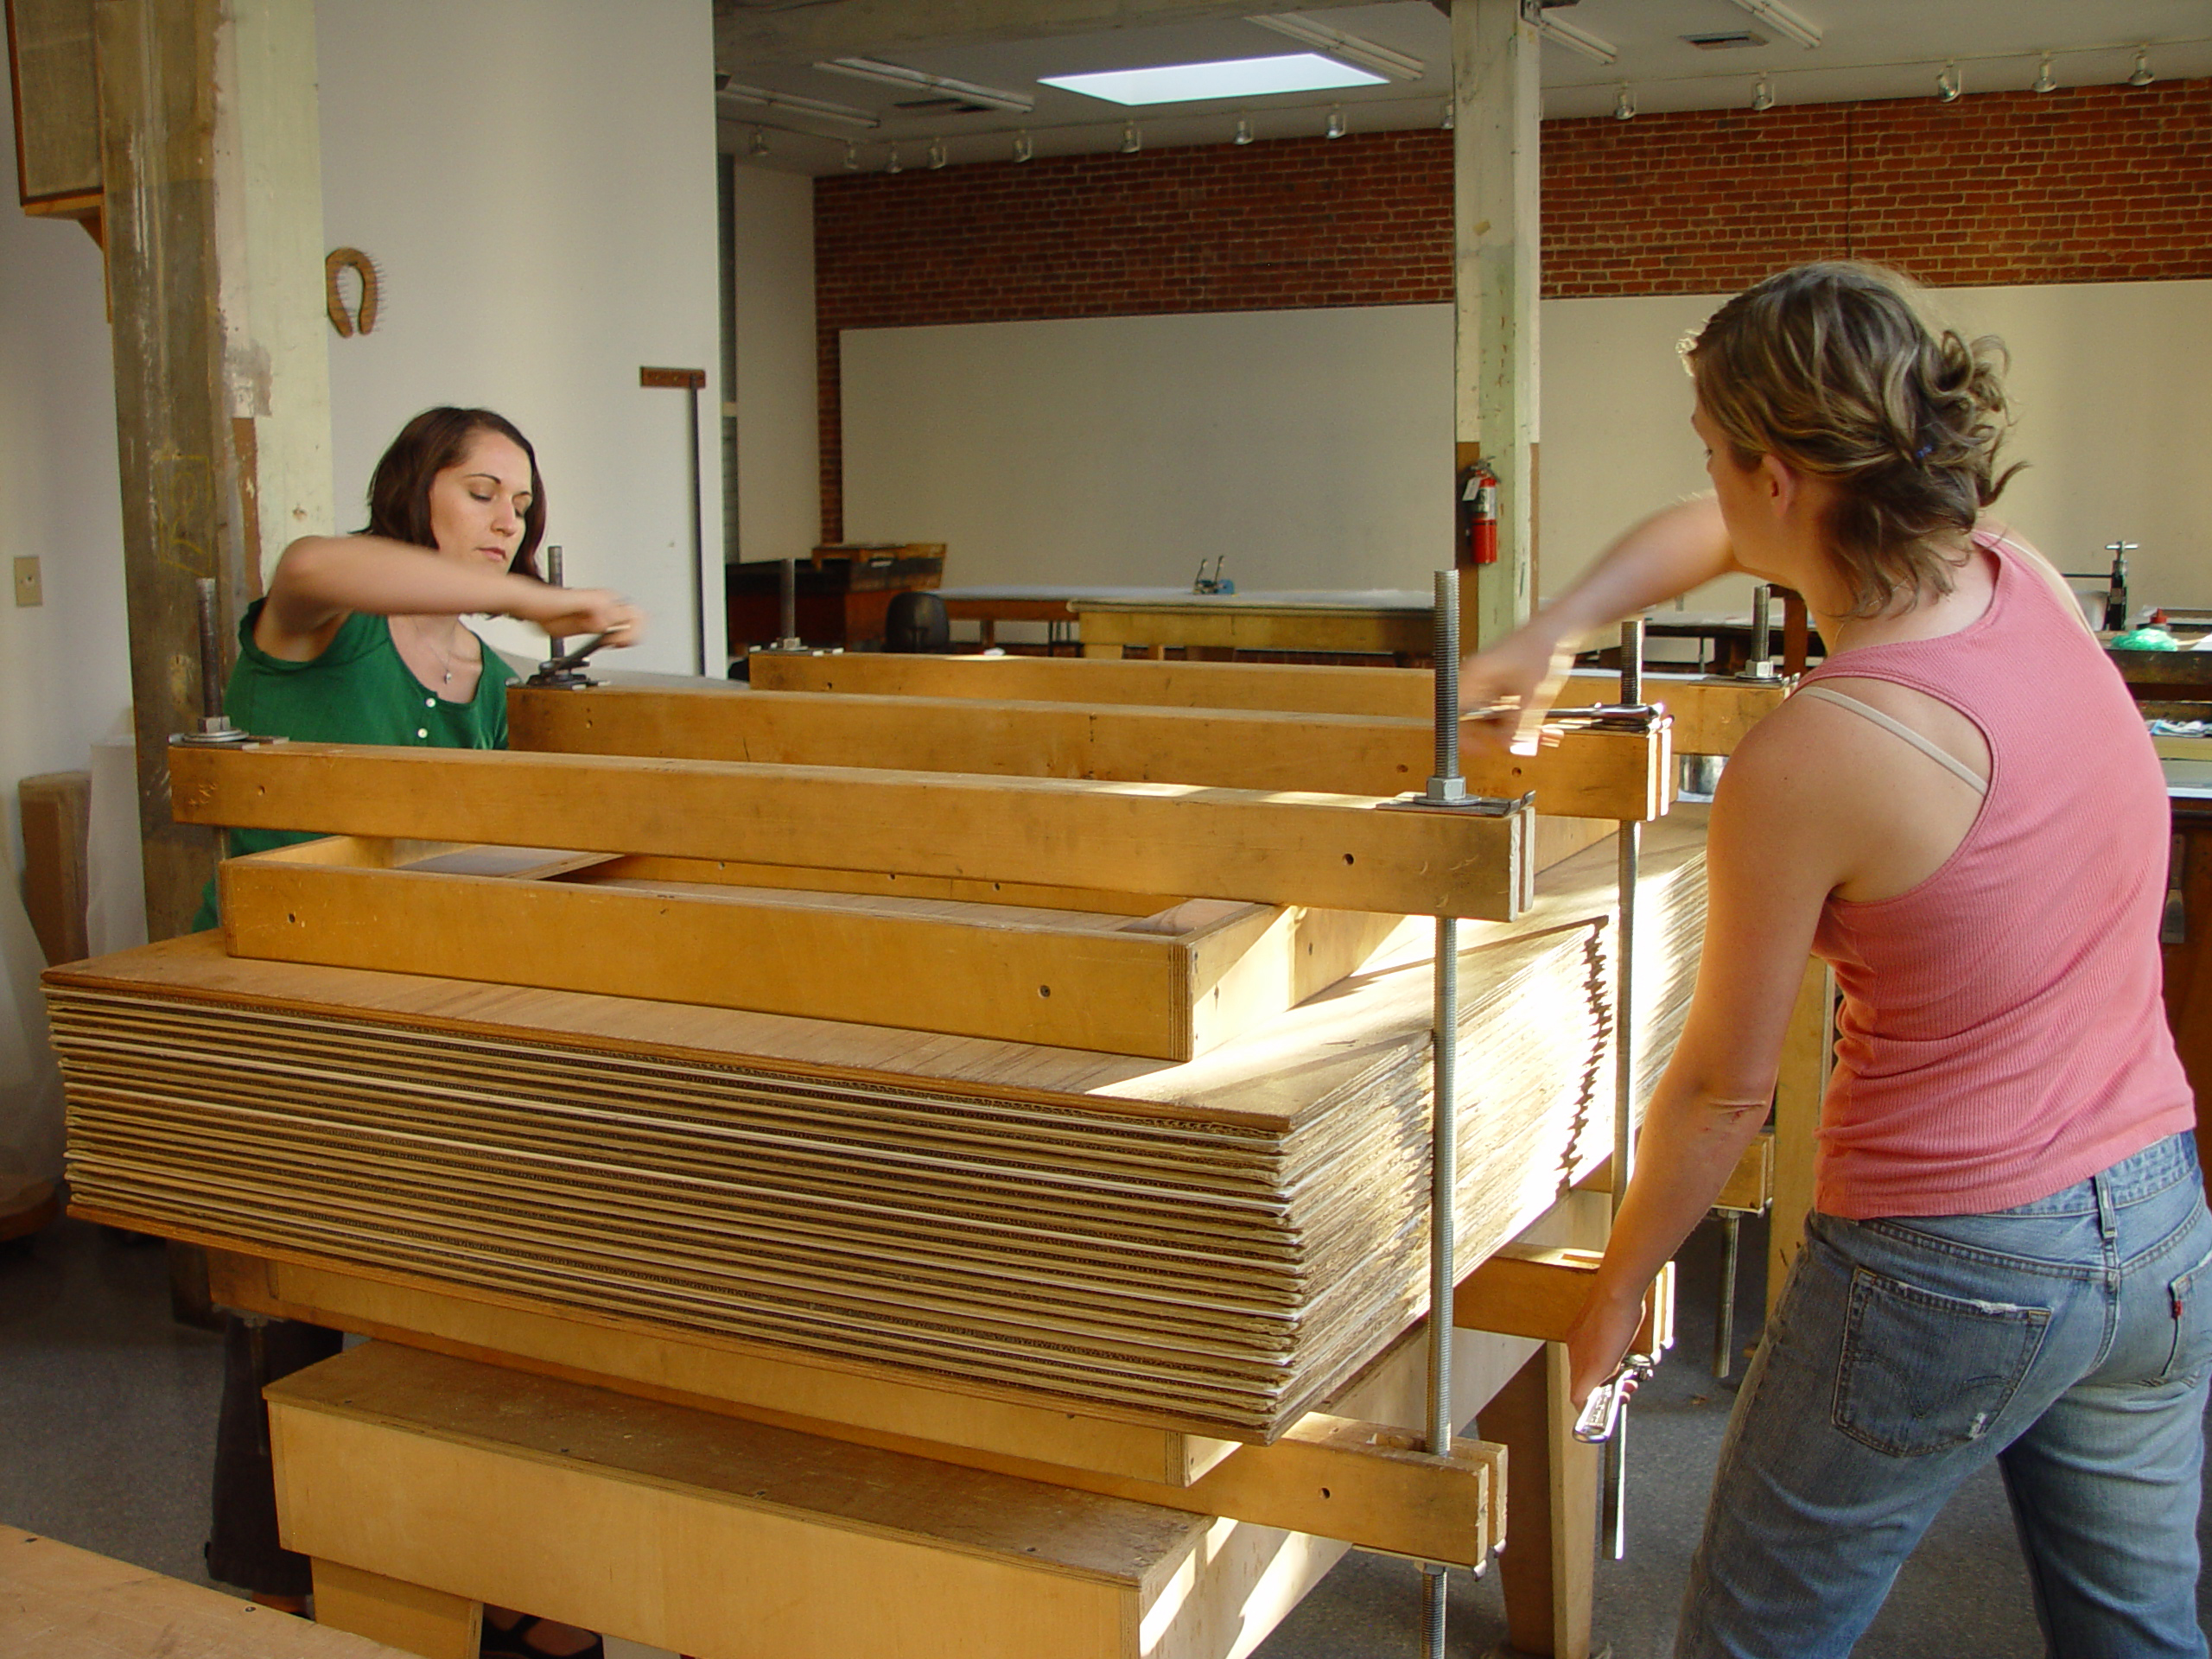
• In order to apply pressure on the stack, you will need (depending on the size of your dryer) at least six long pieces of universal thread stock with nuts and washers on either end. They will be fitted into slots on wooden braces. Buy metal guards for the slots.
• Make slotted braces to hold the thread stock. You will need at least 18 one-by-three inch boards long enough to reach across the plywood in the short direction and overhang about five inches on each side. It takes three of these to make each slotted brace for holding the thread stock. To make a slotted brace, sandwich a short board between two long ones, then glue and screw the three boards together. Even a small dryer needs a brace at each end and one in the middle; a large one needs even more.
• Purchase a squirrel cage blower for air and a small portable non-tip electric heater. Place the blower and heater on the second (empty) table of the dryer pair, or use another small table or stand big enough to hold both of these items. The heater stands near the air intake of the blower. It should be a small heater, without large heat volume (run it on medium rather than high). Do not put it too close to the blower. You want to send warm, not hot, air into the stack. Be sure your heater is UL-rated and is safe to leave unattended. It should have a mechanism that will turn it off automatically if it should tip, and it should not under any circumstances produce sparks. If you are concerned about leaving the heater unattended, you can dry the prints without it, but it will take longer.
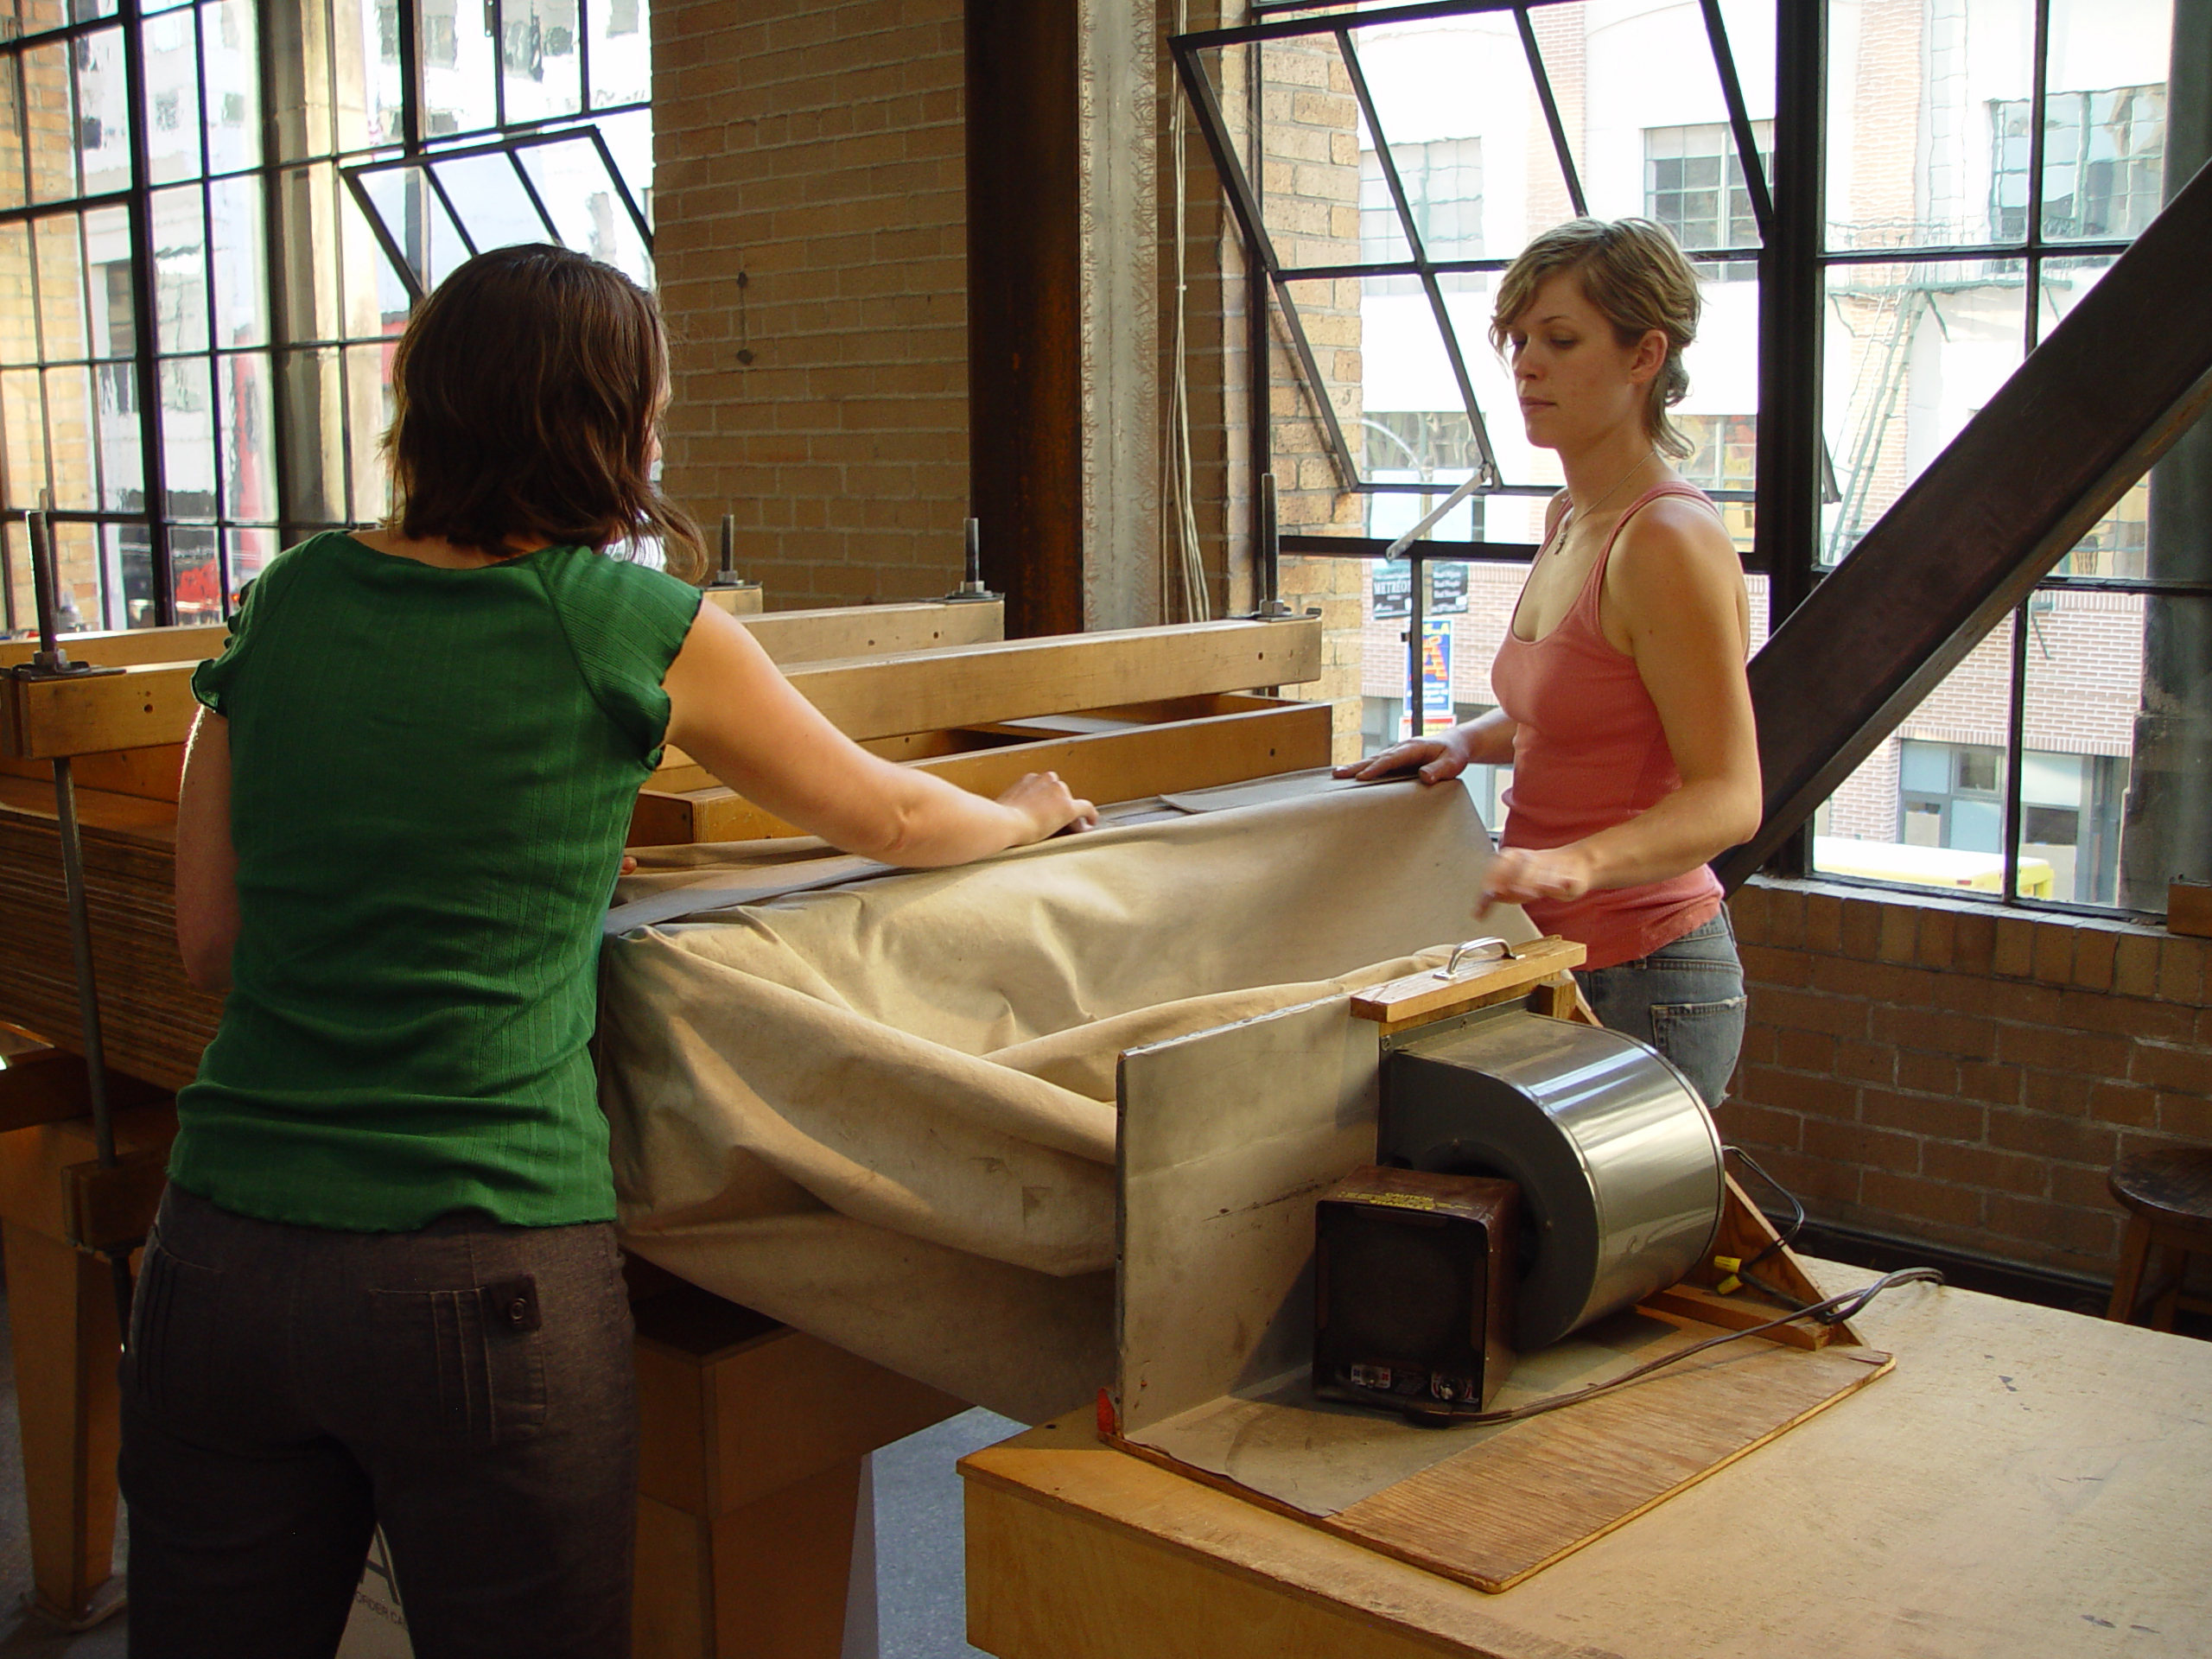
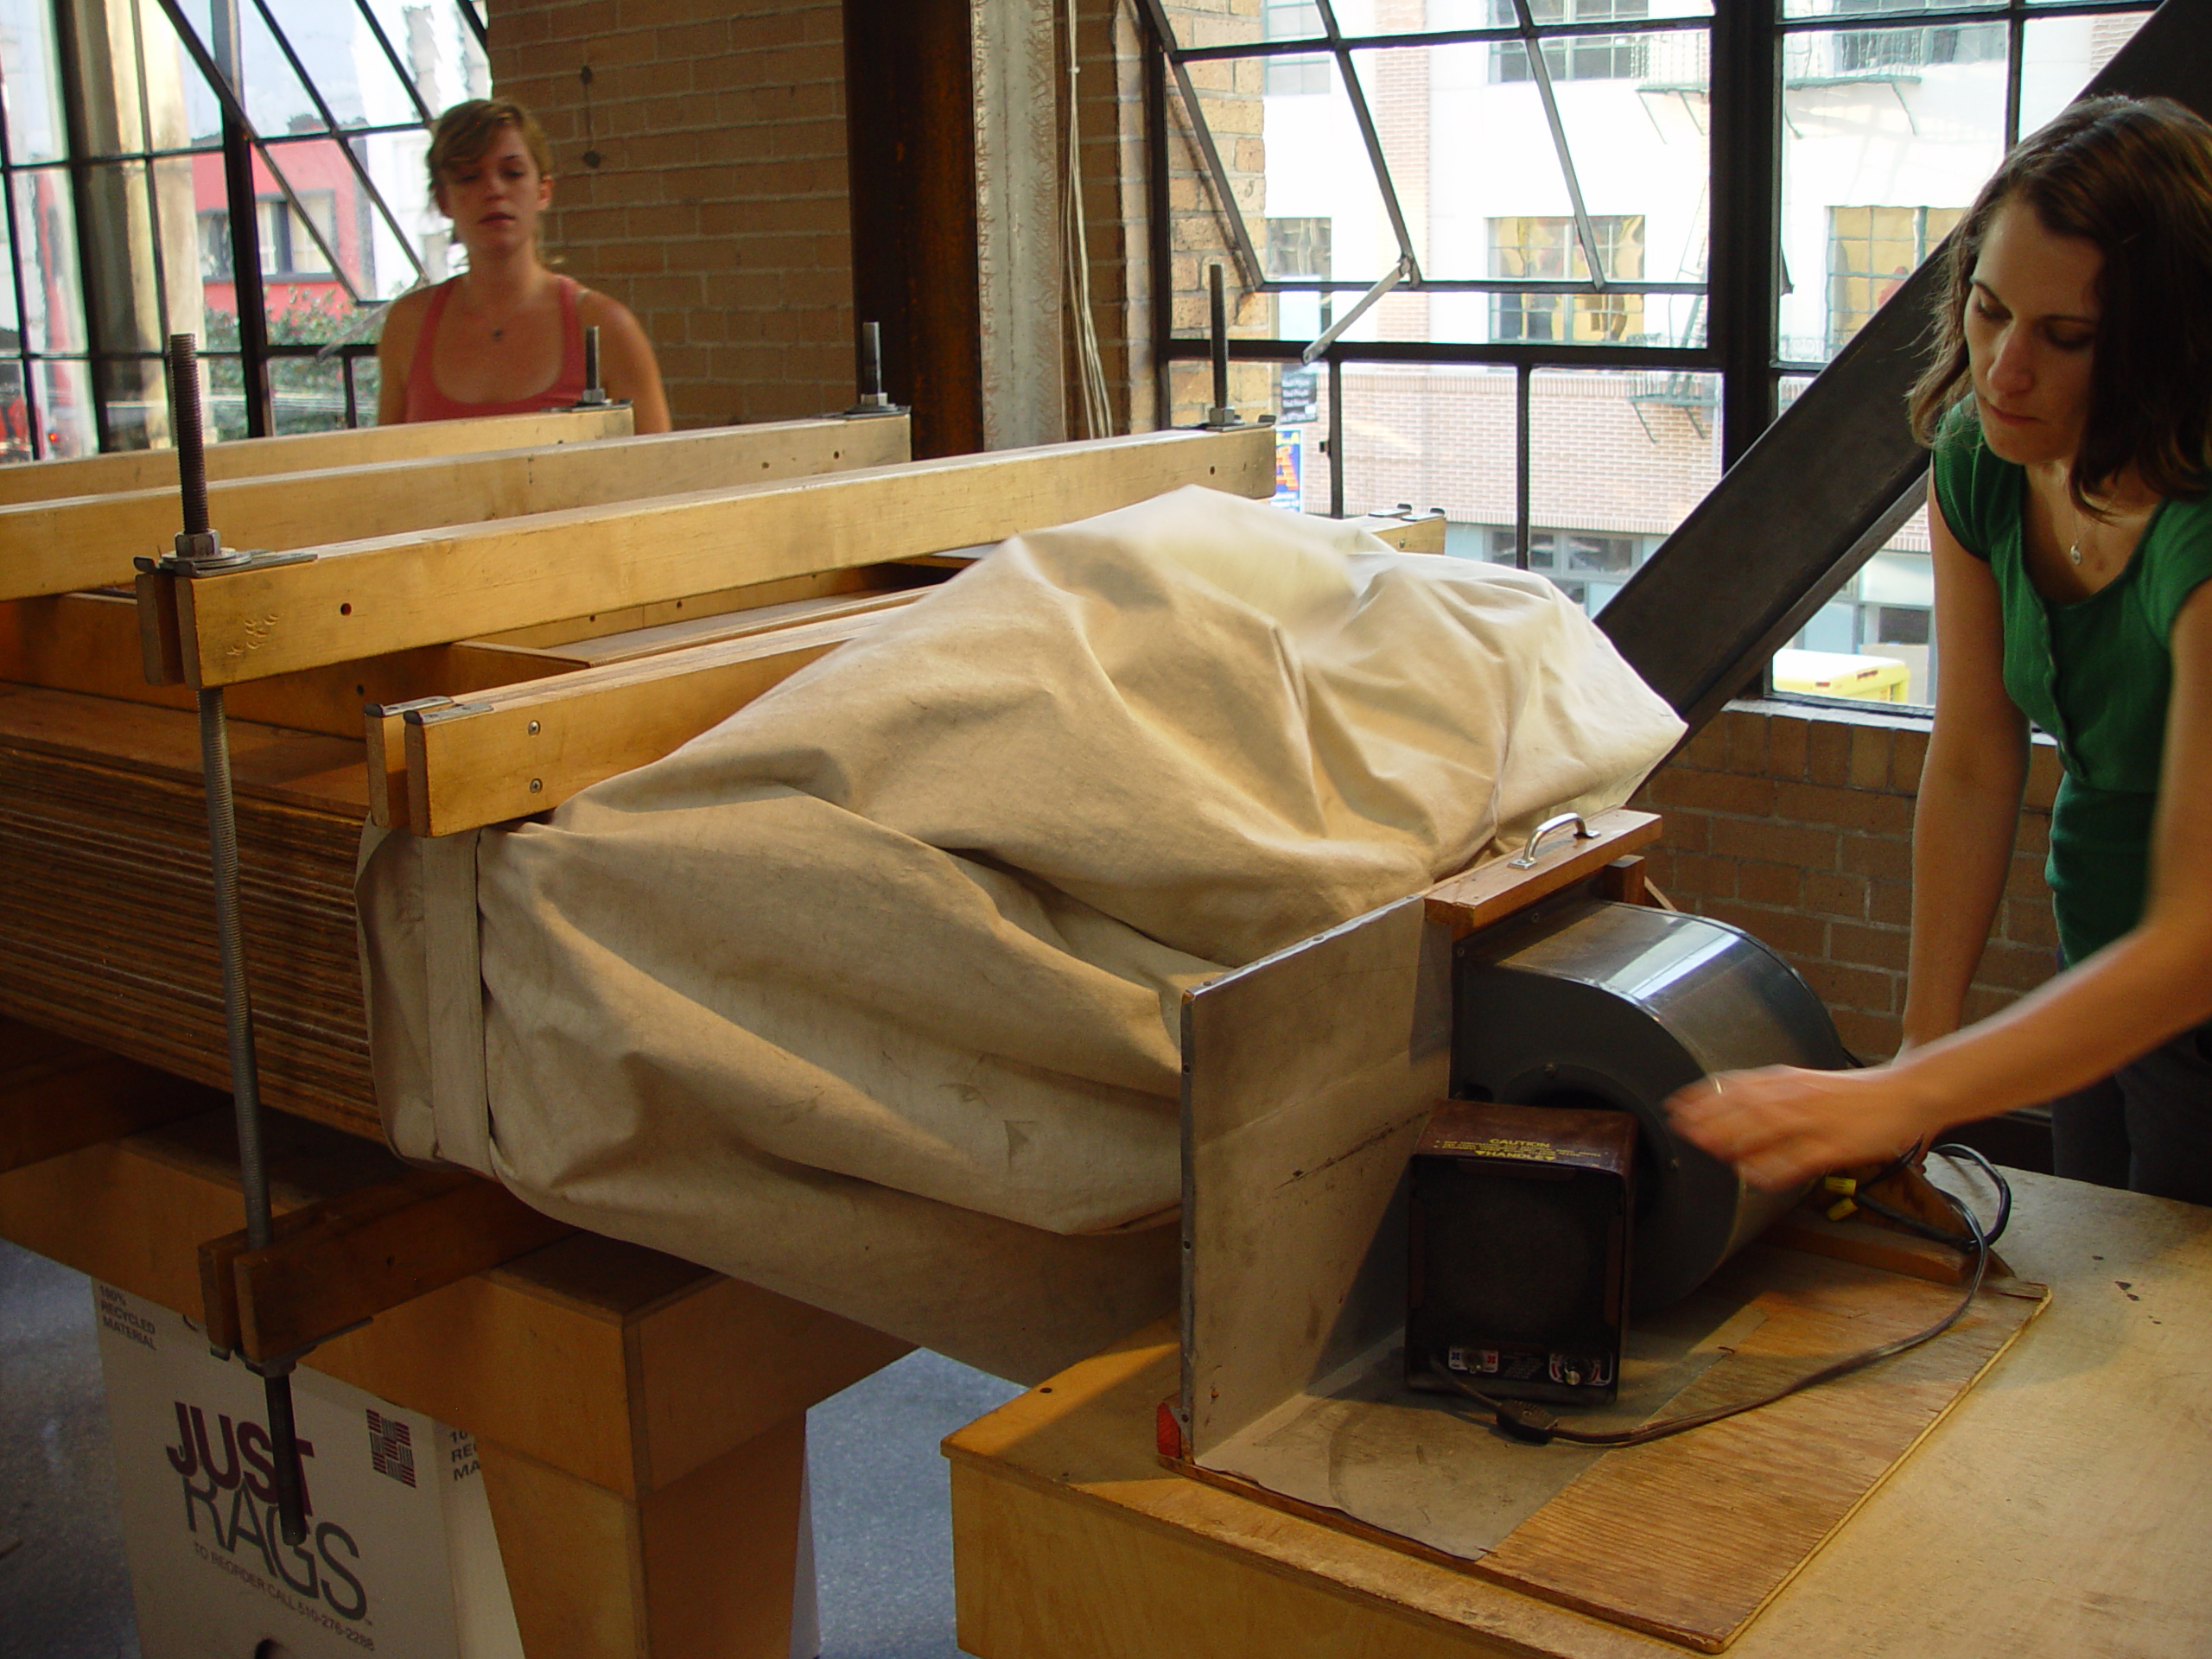
• A funnel-shaped cloth bag, preferably made of heavy cotton duck and open at both ends, is required to guide the air from the blower into the stack of cardboard. At Crown Point we found a sailmaker to sew our bag. The smaller end of the bag fits over the blower’s air out–flow opening. Tighten it in place with Velcro strips, rope or bungee cords. The larger opening of the bag must be big enough to fit over the end of the entire stack of cardboard and the plywood sheets in order to feed air from the blower attached to the smaller end of the bag. The warm air circulates through the corrugations and wicks moisture from the prints through the Upson Board and then out through the corrugations of the cardboard.
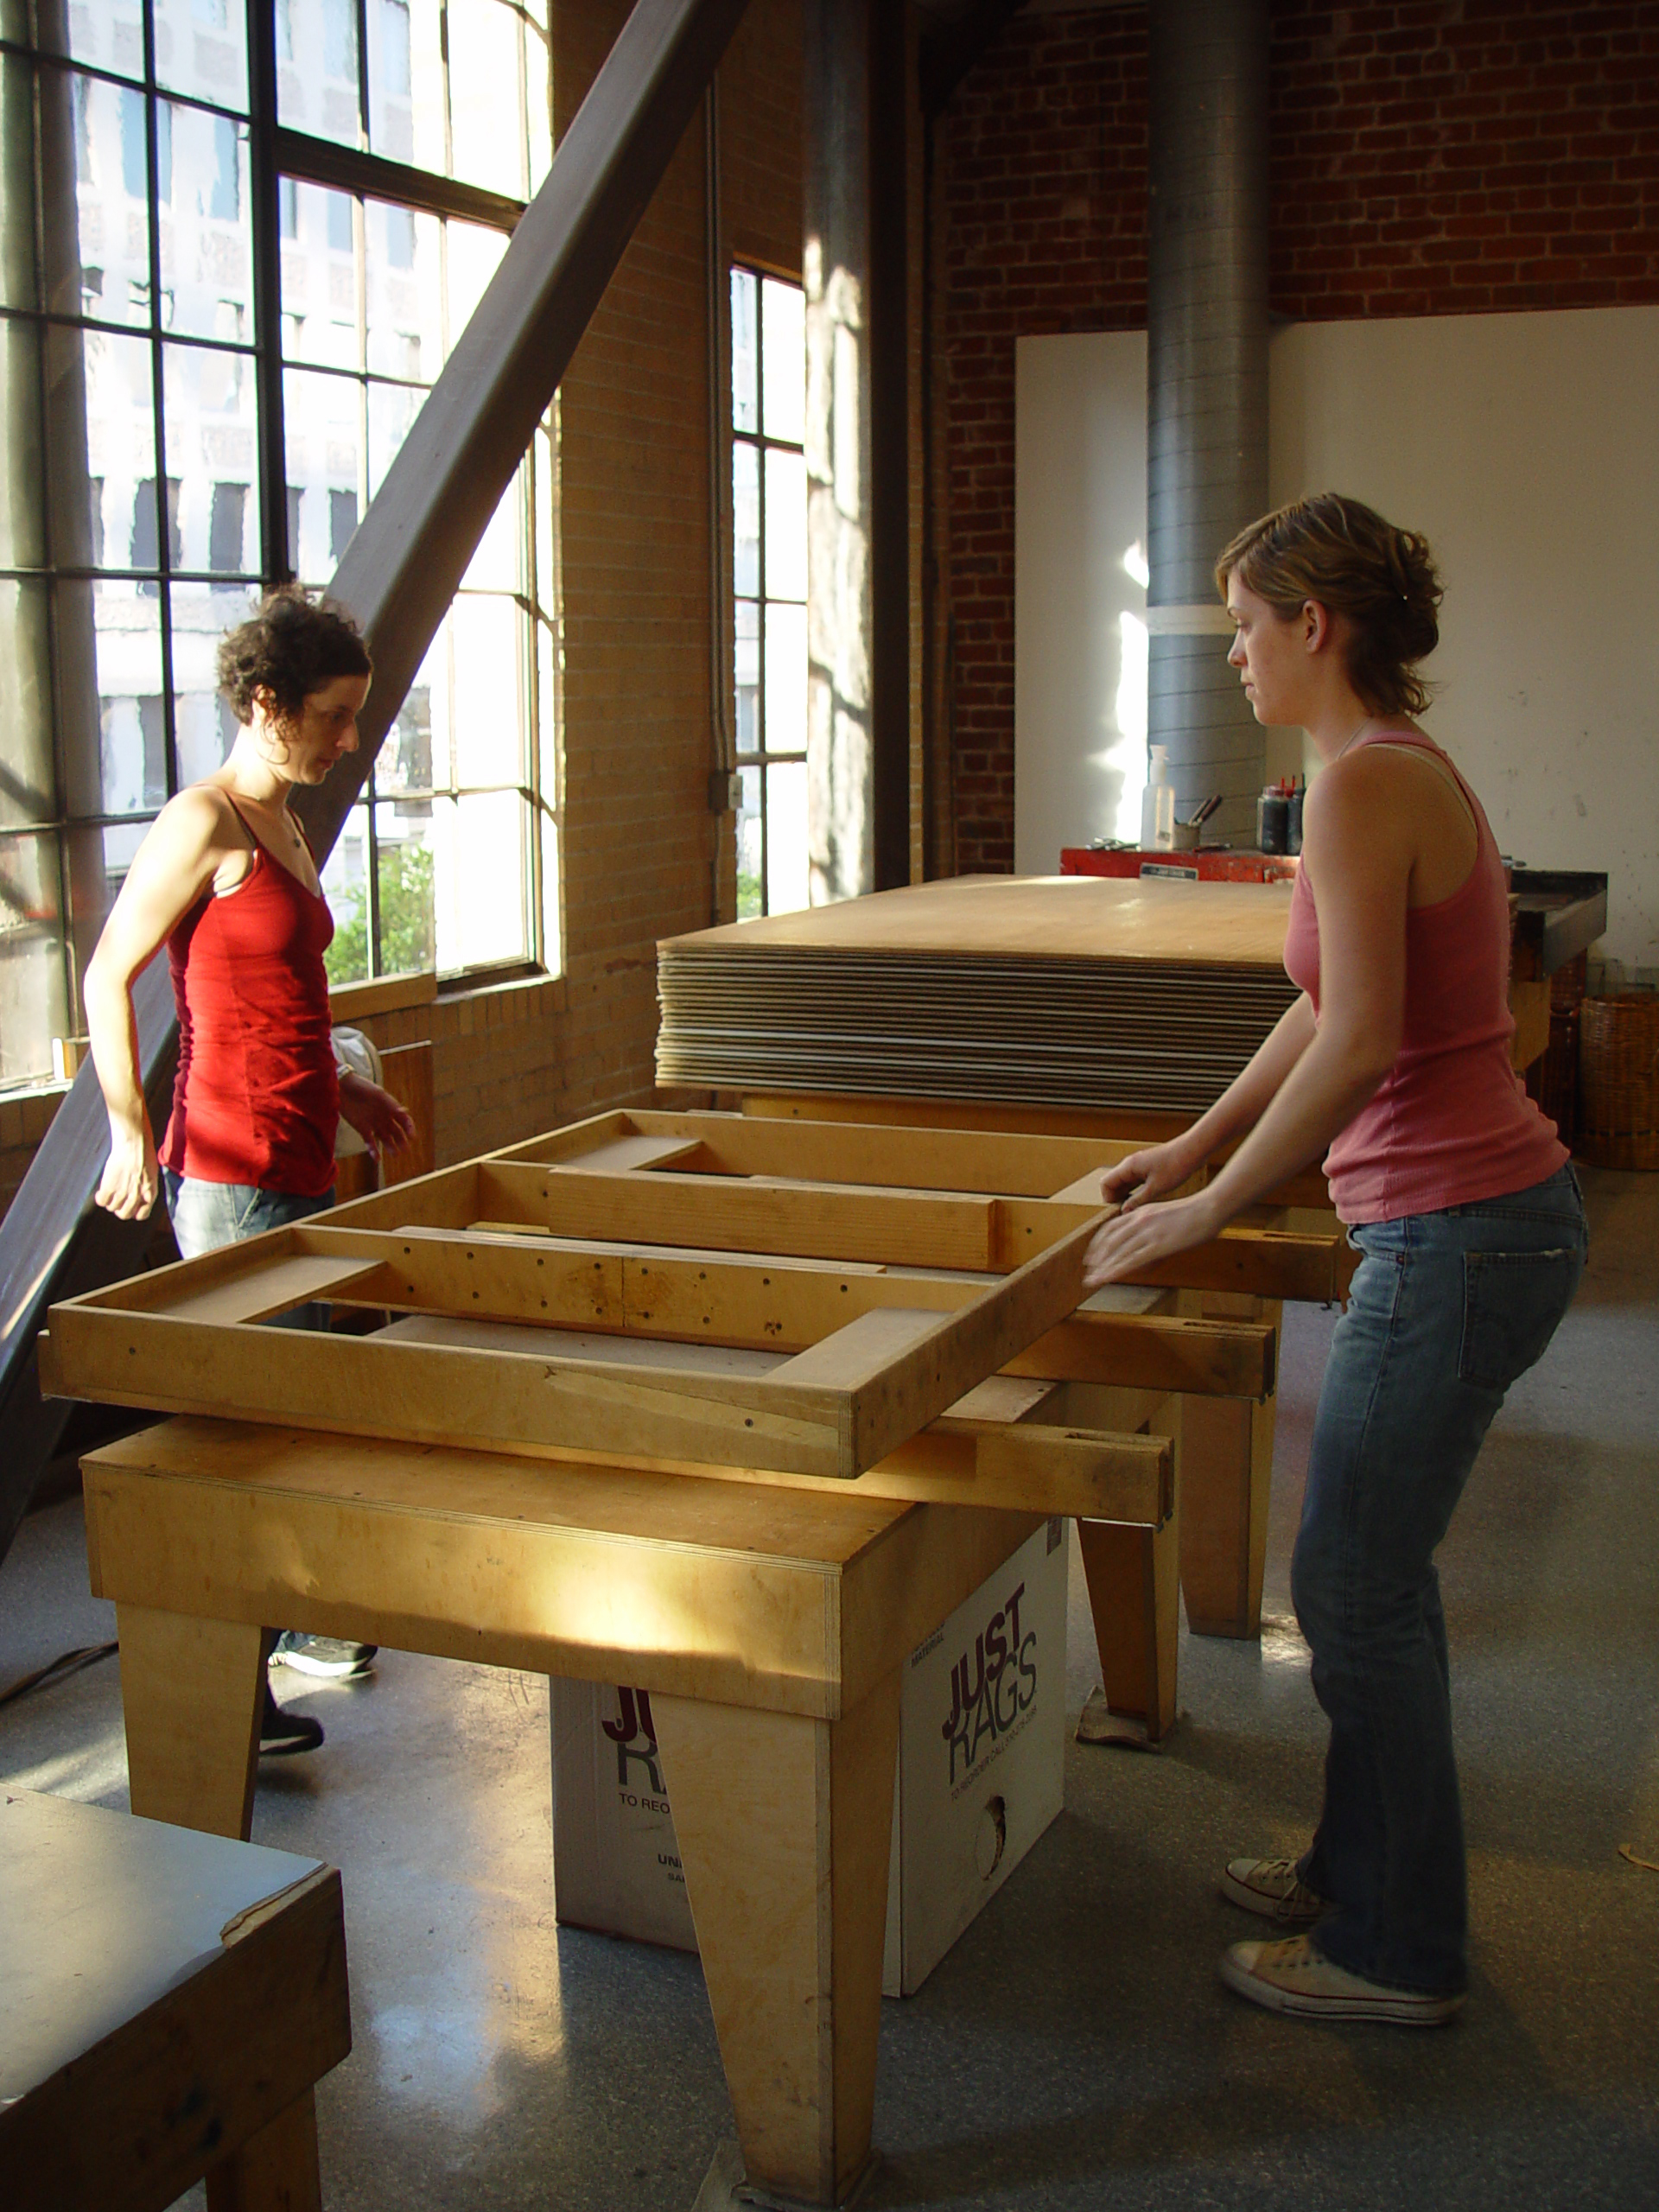
Loading a Dryer
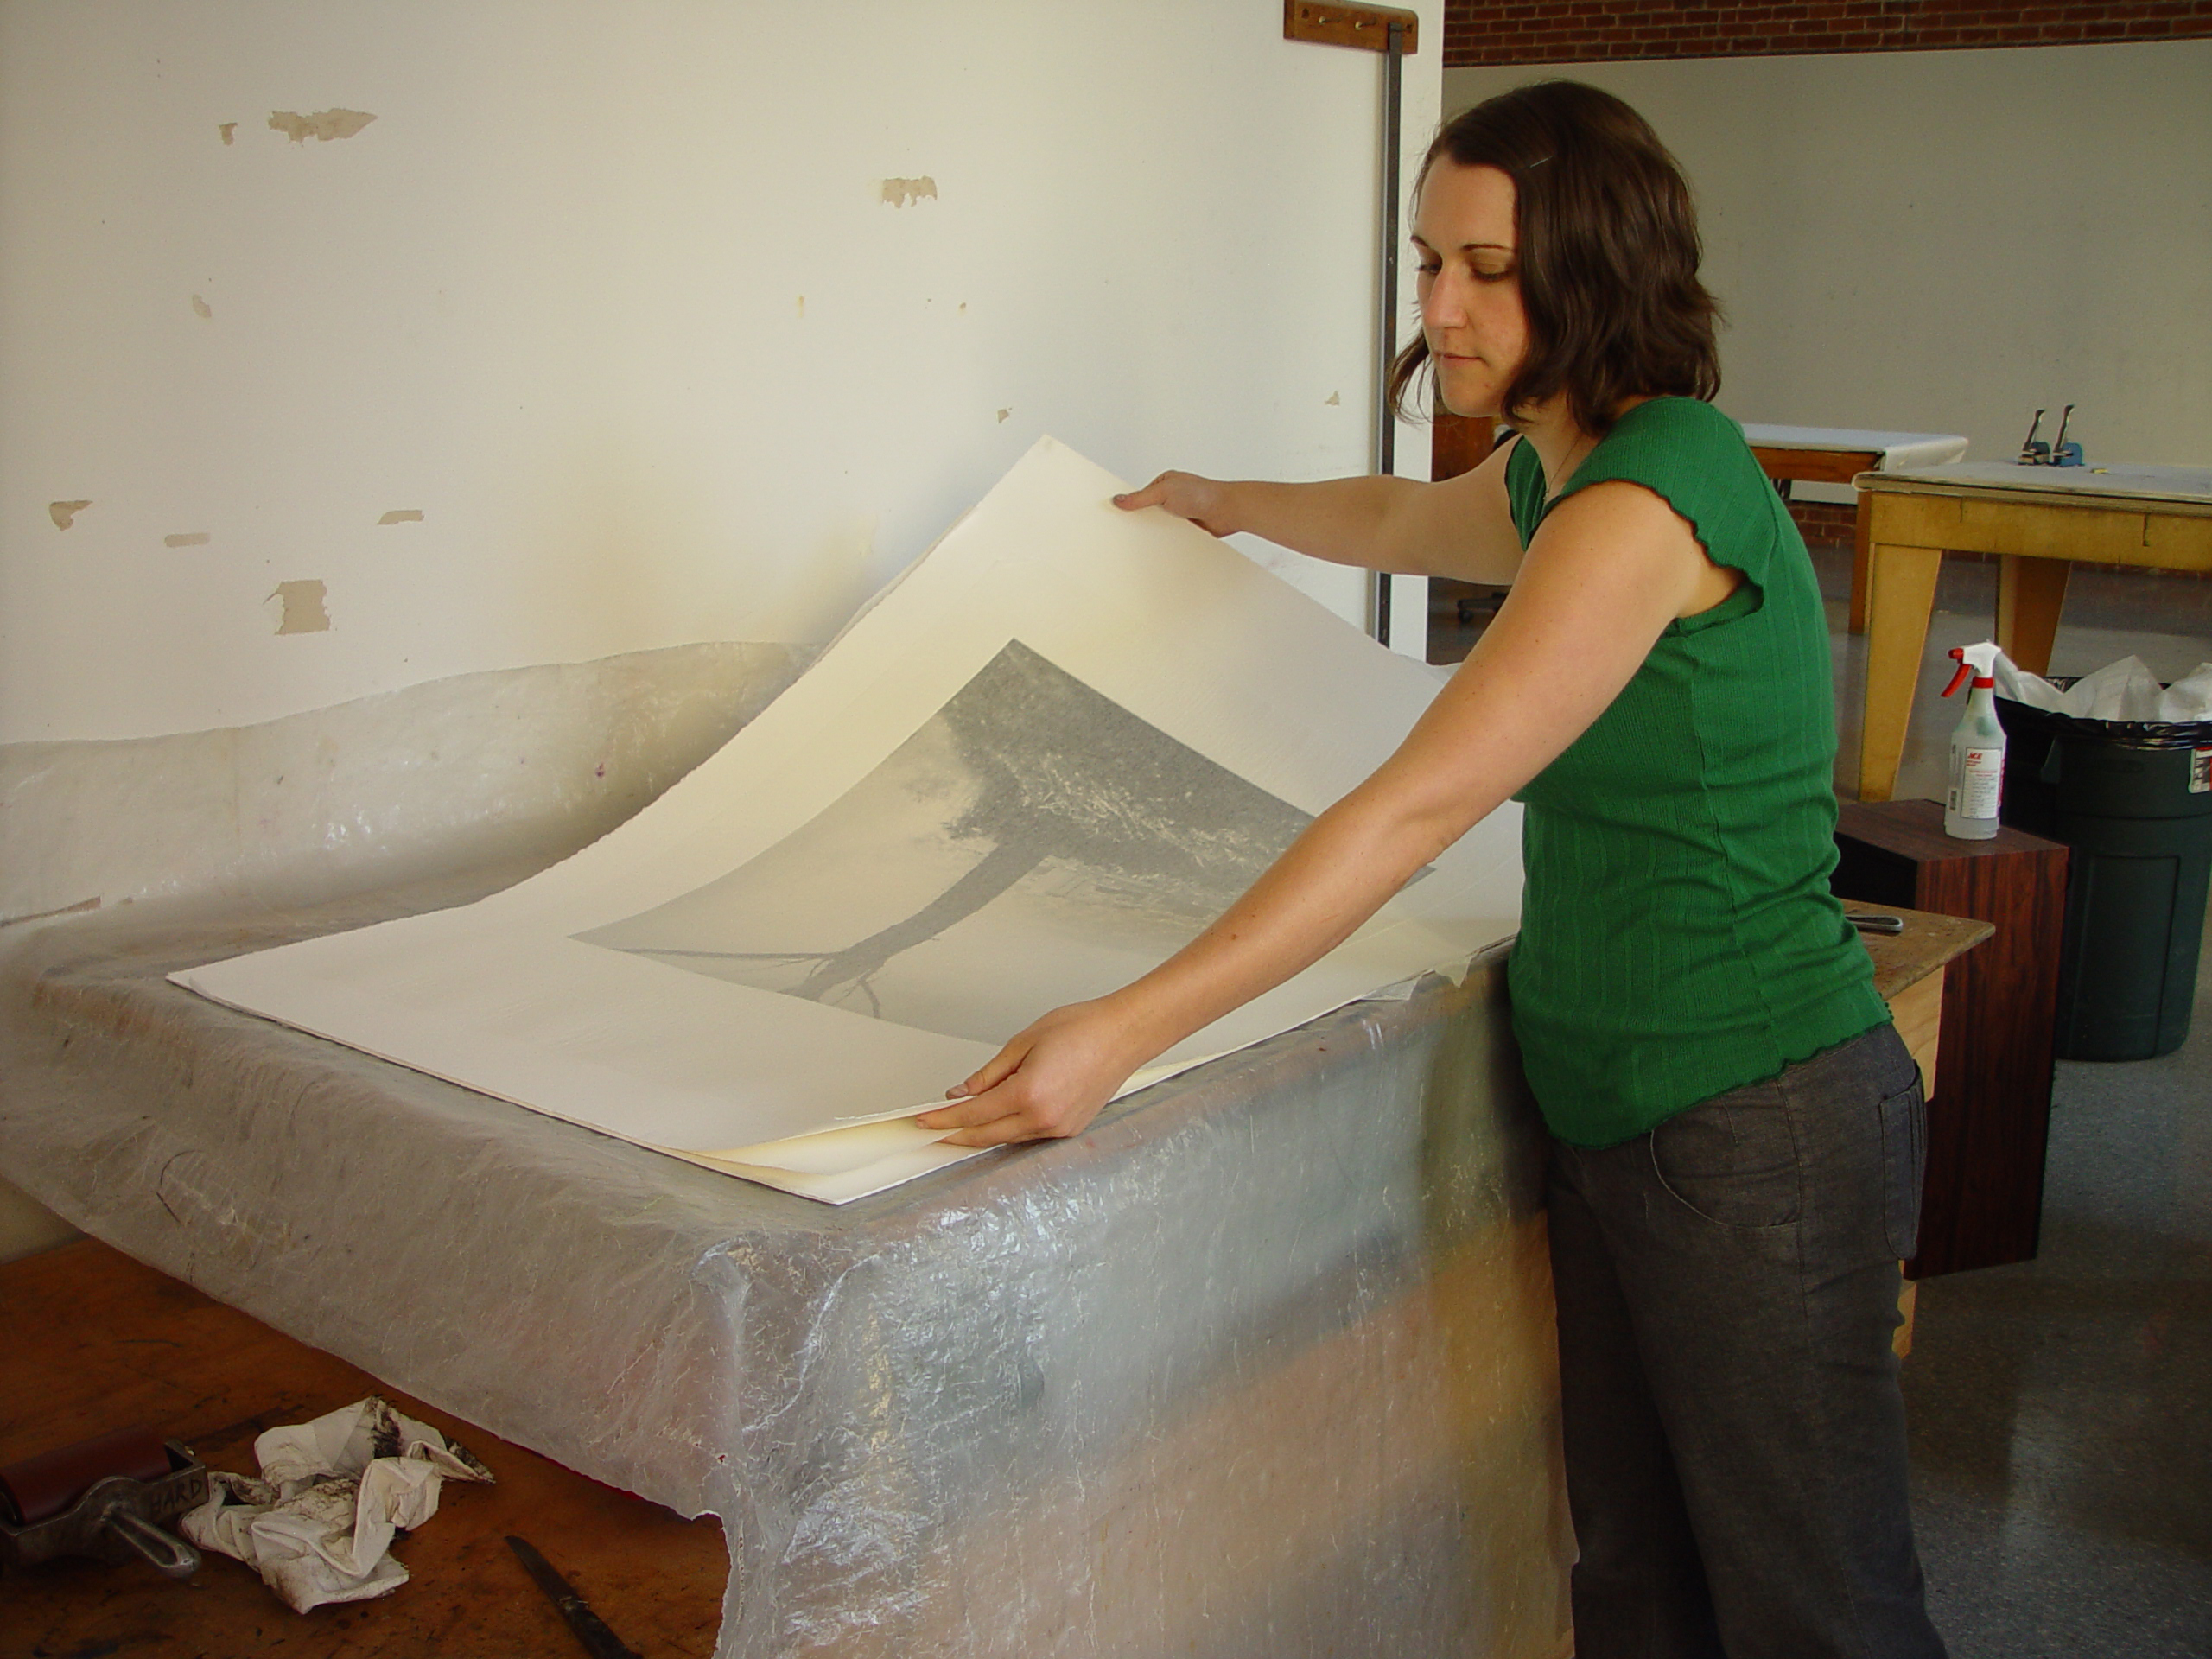
At Crown Point we usually keep a day’s worth of printing in a plastic damp pack and load it into the dryer at the end of the day. If your prints have been air-dried, mist each one, blot it, and wait for it to relax before loading.
•Arrange the slotted braces parallel to each other on the empty table, with the slots hanging over the edge.
• Place a sheet of three-quarter inch plywood on top.
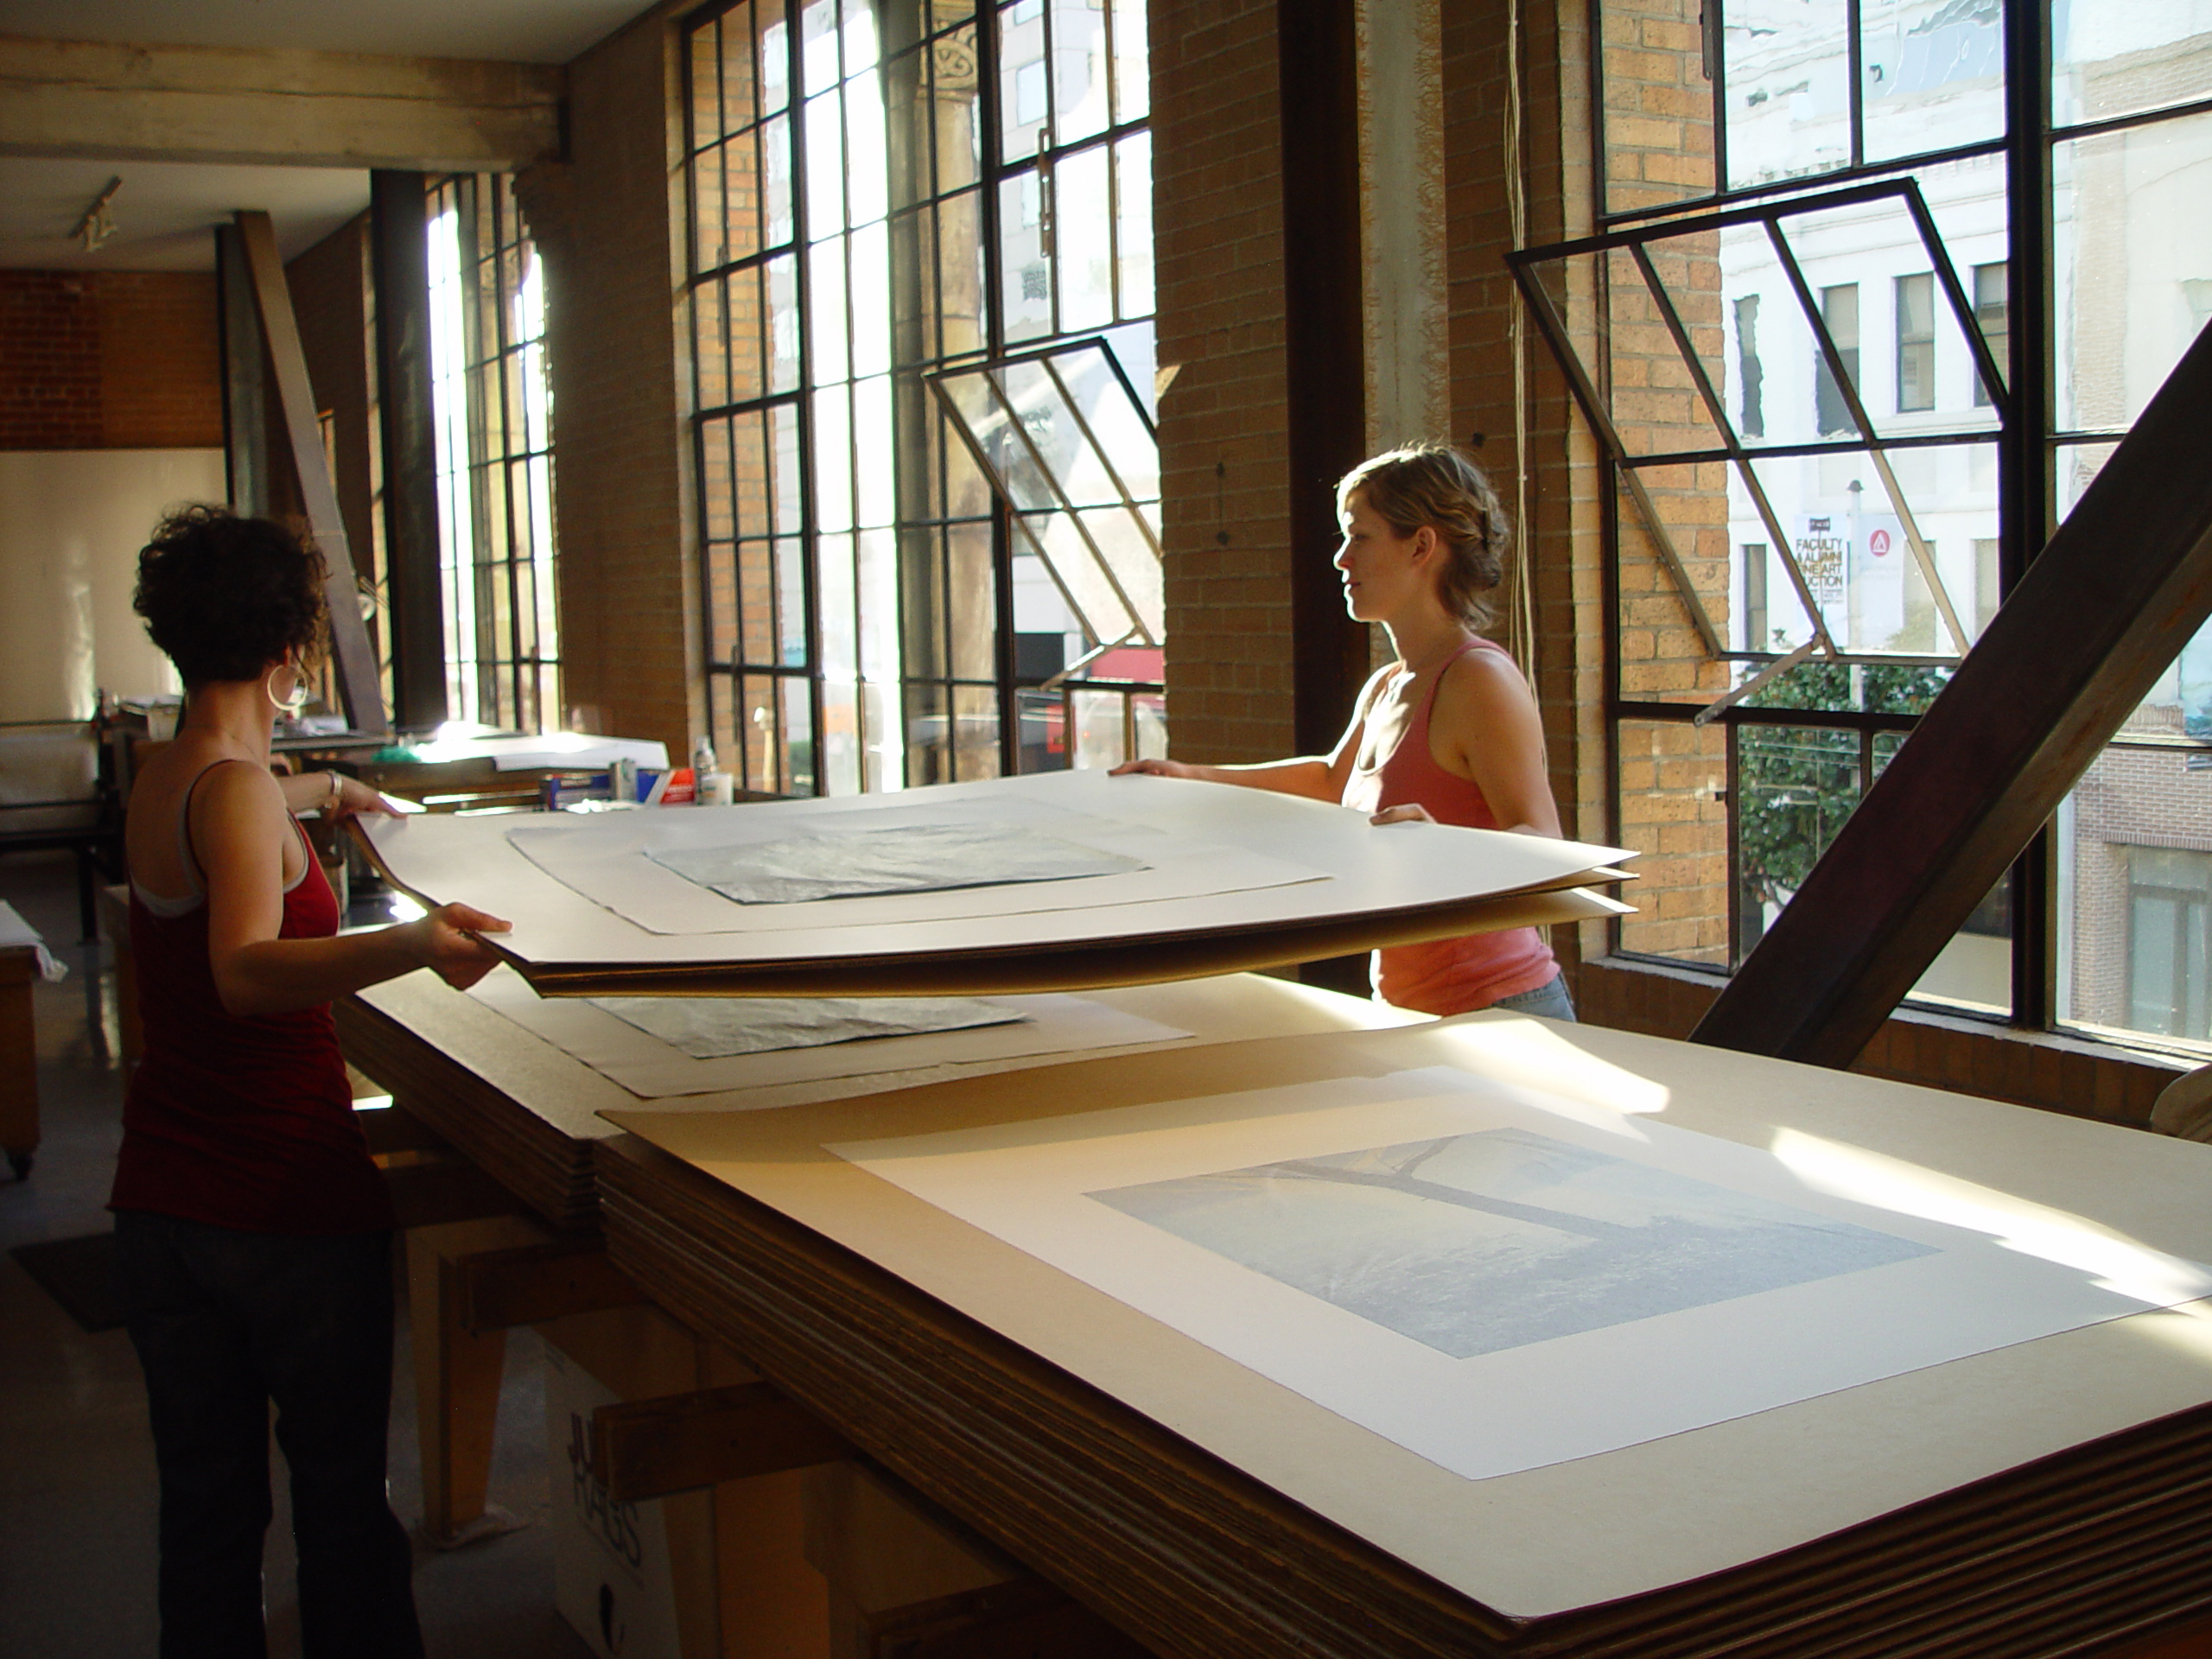
• Add the first sheet of corrugated cardboard, and then a sheet of Upson Board, smooth side up.
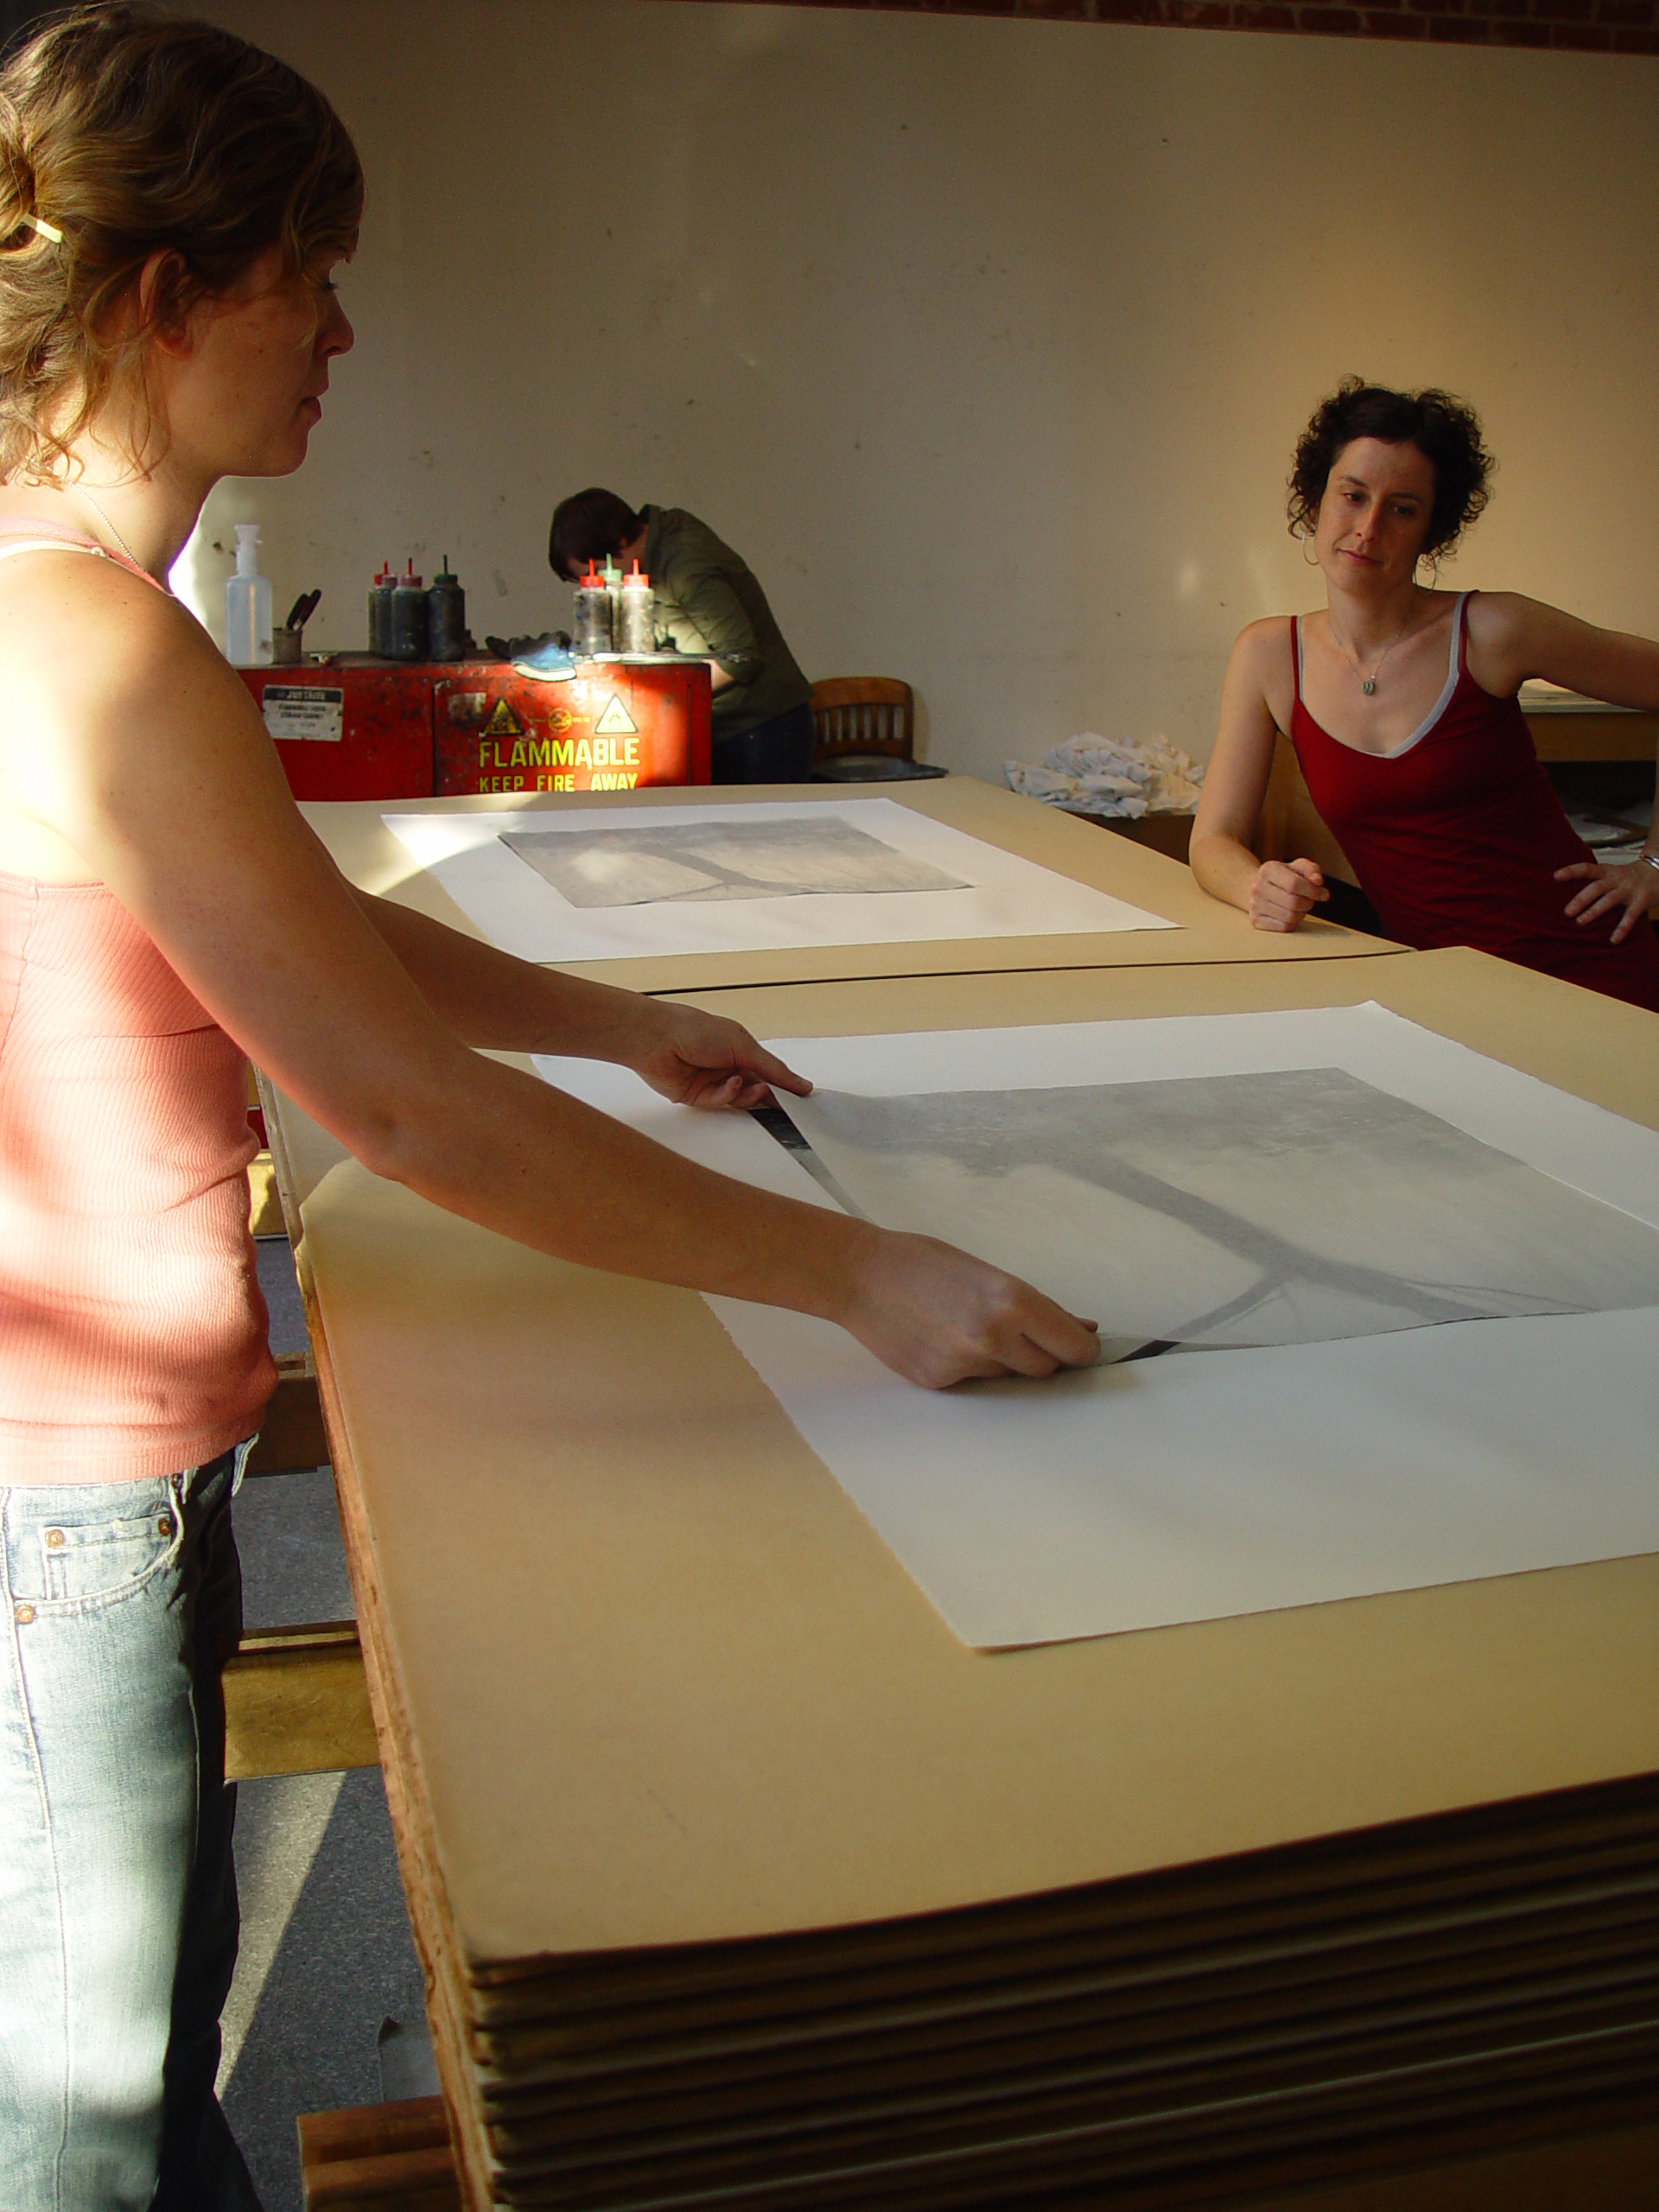
• Place as many prints as will fit in one layer on the Upson Board. If you are concerned about acid in the Upson Board transferring to the prints, you can use acid-free interleaving paper under and over each one. However, the movement of moisture from prints into the Upson Board discourages the acid in the board. Do not leave the prints in contact with the board for long periods after they have finished drying.
• Cover each print with tissue if the ink is wet. At Crown Point we use snow-white tissue paper which can be purchased in packages of 1,000-24×36 inch sheets from commercial paper suppliers and from some packaging stores. Use sheets of tissue cut to fit the platemark exactly. If your image is larger than the tissue, butt sheets of tissue together to cover it. Overlapping the tissue or leaving its edges on the margins of the prints during drying may cause embossed marks.
• If your prints are embossed and you are concerned about retaining subtle embossing or a distinct plate mark, lay a piece of velveteen fabric (large enough to cover the print entirely) under each print, and another on top.
• Gently position a sheet of Upson Board on top of the fabric or the prints themselves if you have not used fabric. Follow this with a sheet of corrugated board, and then another sheet of Upson Board on which you lay more prints. Continue this process until all your prints are stacked into the dryer.
• If you have extra Upson and corrugated boards, add them to the stack so the bag will fit properly.
• Place the second sheet of plywood on top, and then the frame.
• Align the remaining slotted braces with the braces on the bottom.
• Slide the threaded stock into the slots and tighten the nuts with a wrench. Experience will teach you the proper amount of pressure. Generally, the more damp prints you enclose in the dryer, the more pressure you need, because there will be more shrinkage of the stack during drying.
• Fasten the bag over the end of the dryer and turn on the blower and the heater. The prints usually will dry overnight, but if they were very wet to begin with they might require as much as two nights and a day in the dryer.