 When I received an inquiry about which black inks we use and how to properly use ink modifiers, oils and tack reducers it reminded me of the old breaking-up saying “it’s not you, it’s me.” I thought back to my college days and my battles trying to get my plates to print properly. In my mind the problem was always the ink. For some reason it just didn’t seem to like to stick to my aquatints and I thought the solution was to modify it by adding magnesium carbonate to stiffen the ink up in hopes of it staying put in the plate and to then to print it with a ton of pressure.
After I started working professionally in printmaking the year after my graduation, I had an epiphany when I realized that there were many other contributing factors that led to my bad print, and nearly none of them had to do with the ink. I think it’s all too easy to fall into the trap of blaming your inks and attempting to modify them in hopes of them working better when the real problem may be in your plate-making or your printing technique. For me, I realized that I had been over-melting my aquatints, which wasn’t creating sufficient tooth in my plate for the ink to cling to. In the end it wasn’t a problem with the ink but a problem with my approach to plate-making.
As printmakers we all have quite a knack for detail but I think to be really successful with etching it requires stepping back and seeing the big picture and the way things are connected. Etching is a big problem-solving game for the most part and at times it is all too easy to focus on one small detail or issue, which can make it hard to see other factors that may be at work. If you understand the way each step affects the next, it can be much easier to pinpoint the origin of the problems you are having and add to the overall success of your print.
At Crown Point, we do very little to modify the inks we use. Our go-to black ink is Charbonnel Noir 55981. It’s a cool black that is relatively easy to wipe though not too dry or short, which would make it too easy to over-wipe. It has great richness and depth of color. Specifically for drypoints printed in black we like to use a 50/50 mixture of the Charbonnel 55981 and Graphic Chemical Bone Black 514. The 514 ink is a bit shorter, which makes it a little easier to gather the ink against the burr in the plate. The Charbonnel ink on its own works well too, but it is a bit oilier, which can make it hard to really tighten up a drypoint mark so that it’s very clean and not surrounded by faint tone. All we do to modify these inks is to add some #00 burnt plate oil to condition them a bit.
As for our color inks, we generally use Charbonnel colors for their vibrancy and their pigment-rich color. Some of these inks are quite sticky, which calls for adding some #00 plate oil to loosen them up. Beware of inks that are very dry and short. If you ink your plate and then go wipe the plate with the tarlatan and the ink comes up very quickly it’s very likely that the plate will be over-wiped.
In some cases we add extender to our inks to lighten the color. The addition of the extender also makes some inks easier to wipe. However, I would strongly advise you not to overuse the extender as it can yellow the print if used too heavily. The same advice goes for Easy Wipe or other tack reducers as they can tend to yellow over time, especially in very light colors or faint tonal passages. As a rule of thumb we don’t use these products. If your plate is etched or made well and your printing technique is good you shouldn’t really need to rely on these kinds of products.
If you’re having problems with a plate, I think it’s better to look beyond the ink you are using and objectively look at your plate-making process. If you’re having an issue with the way your aquatints are printing, you’d want to be sure to think about the quality of your rosin dusting on the plate and the way in which is was melted. Please refer to my book, Magical Secrets about Aquatint, for a more in-depth discussion on making a good aquatint.
If your issue is with line work, it also pays to be objective. Someone recently emailed our advice column about a problem with broken lines in his hard ground prints. The first thing I questioned was whether the plate was over-etched. If this is the case, the lines will become so broad that the ink will easily wipe out of them. He was very sure that the quality of the etch was fine so we moved onto his printing technique. With a few basic modifications to his printing approach, it seemed that the problem was solved. Sometimes the thing that makes all the difference is just a small tweak to your usual approach.
At Crown Point Press we use a very straightforward and non-fussy approach to inks and printing. We have a very systematic way of printing that all of the printers follow. This creates a great degree of consistency in our prints. In the appendices of Magical Secrets about Line Etching and Engraving and Magical Secrets about Aquatint, you’ll find in-depth step-by-step directions for our printing method. For the sake of this discussion I’d like point out a few basic printing strategies and concepts to show how much a few simple changes can really affect the quality of your print.
 1. Inking in a comfortable and ergonomic spot is key. To go hand-in-hand with this entry we’ve added plans for an inking stand to the website. While you don’t need to build a stand just like ours, it’s good to take note of the basic setup and concept. The best inking surface is one that is lightly heated and one whose height is about waist high. When you have to hunch over and work low you can’t really see what you are doing and are not able to work as sensitively with the plate. Also, if you maintain a light heat on the plate while you’re inking and wiping it, you’ll find that it can be wiped much cleaner and more efficiently than working with a cold plate. This small change can really alter the way your inks perform, which will create less of a need for modifiers to be added.
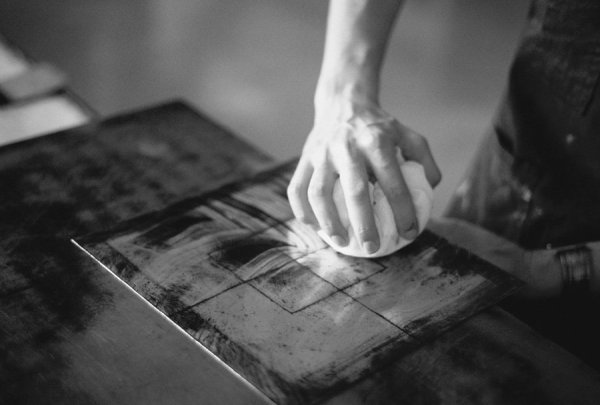
2. A good tarlatan and hand wipe will take you a long way. We like to ink our plates using a plastic card and then use a relatively clean and broken-in tarlatan. We use just one tarlatan pad to clean the majority of the ink and then move onto the hand wipe. Once the tarlatan is full of ink and there are no more clean spots we retire it and get a new one. You want to be sure you’re not using a super old and soft tarlatan, as it will be very prone to pulling out too much ink from the plate. In the case of the fellow with the skipping hard ground lines, he just needed to get a new tarlatan and then stiffen his hand up a bit when hand wiping so it didn’t pull into the lines too much. Two simple changes completely changed his print.
![]()
3. When you’re printing, the quality of your paper and blankets are key. We only use woven wool felt blankets. Check our supplier list to find a good source for purchasing blankets. You can also find information about how we configure and use these blankets on our presses in the advice section under the title Blanket Bind. Ideally you should prepare your paper the day before you are set to print. Soak your paper briefly, just enough to get it evenly wet, and then drain off the excess water. Next, set the stack of paper between two dry blotters and wrap it in a sheet of plastic and then weight it on top with an old plate or something heavy. When you go to use the paper you’ll find that it’s evenly moist throughout, without too much water sitting on the surface.
Who knew the topic of black ink could provoke such a discussion? I hope I’ve given you some ideas that will help in your studio practice.
By Emily York, Crown Point Senior Master Printer